Commander,
The
 X
X
![]() Centurion Action X
tree of vehicles all share similarities in their design and playstyle. But there are still notable differences in how each vehicle operates; between other vehicles in the same tree, and how each vehicle performs in their own Tier.
Centurion Action X
tree of vehicles all share similarities in their design and playstyle. But there are still notable differences in how each vehicle operates; between other vehicles in the same tree, and how each vehicle performs in their own Tier.
This guide breaks down how to best play, equip, and crew each vehicle to enhance their strengths and mitigate their weaknesses.
Fell in love with the
X
![]() Centurion Action X
? Speed your way to this Tier X medium tank with ongoing deals will X5 XP missions and discounts on tech tree research! Check out details below!
Centurion Action X
? Speed your way to this Tier X medium tank with ongoing deals will X5 XP missions and discounts on tech tree research! Check out details below!
Centurion AX Tree Overview
Each vehicle in the Centurion AX tree have different characteristics, depending on their tier, so it is necessary to adapt your playstyle to each vehicle. The low-tier vehicles are comparatively heavily armored and slow, while mid-tier vehicles have excellent mobility at the expense of armor. Higher-tier vehicles have strong turret armor and outstanding firepower. In addition, high-tier vehicles have high HE penetration. The
IX
![]() Centurion Mk. 7/1
can be outfitted with a gun that can use HESH, a premium round with special parameters.
Centurion Mk. 7/1
can be outfitted with a gun that can use HESH, a premium round with special parameters.
What are the features of each vehicle? What is the recommended way to operate it, and what equipment should be installed? Let's find out in our guide below!
- Cruiser II
- Valentine
- Matilda
- Cavalier
- Cromwell
- Comet
- Centurion I
- Centurion 7/1
- Centurion AX
The
II
![]() Cruiser Mk. II
is a versatile and aggressive light tank with good, all-round attributes and stand-out offensive performance and survivability.
Cruiser Mk. II
is a versatile and aggressive light tank with good, all-round attributes and stand-out offensive performance and survivability.
There is a choice of two main guns for the Cruiser Mk.II: the QF 2-pdr Mk. IX prototype, which is the basic single-shot gun, and the 40mm Pom-Pom, which is the upgraded gun equipped with an auto-loading system.
We recommend the 40mm Pom-Pom, which sacrifices accuracy and DPM for high alpha damage; it fires two shots with one trigger-pull, so it takes a little getting used to. The initial gun, the QF 2-pdr Mk. IX prototype, is good enough to put up a decent fight, so if you want to speed up your research to the next vehicle, you can skip this upgrade.
It has decent armor for Tier II, and one of the highest HP pools, allowing it to withstand more hits than any other vehicle in its tier. But be aware that unless the penetration of the enemy vehicle is very low, a direct hit will easily penetrate its armor. Also, in exchange for its excellent survivability, its mobility is rather low.
| Strengths:
| Weaknesses:
|
Recommended Setup
The setup was designed to improve attack performance.
| Equipment |
|---|
 |
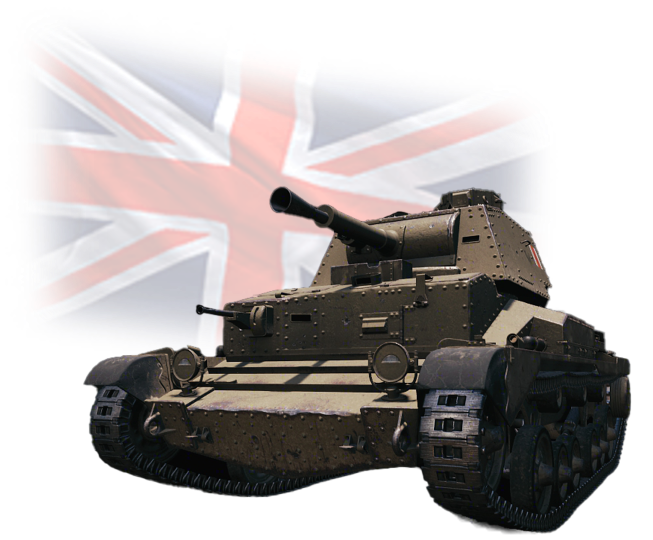
The
III
![]() Valentine
is a defensive light tank with thick armor at the expense of mobility.
Valentine
is a defensive light tank with thick armor at the expense of mobility.
The hull armor is 60mm all around, with a final turret armor of 65mm, making it one of the toughest tanks in Tier III. If you take a defensive position behind cover, it can easily repel even attacks from higher tiers. However, the Valentine still has a few weak spots. In the front of the vehicle, there is a section of 60mm armor that is easily penetrated by a direct hit. The rear of the vehicle is also a vulnerable spot that is easily penetrated due to the verticle angle of the armor. Because of its low mobility, it is important to watch out for enemy vehicles to prevent them from getting behind you.
To fully unlock the potential of this vehicle, we recommend fully researching and installing all modules except the main gun. I recommend using the QF 2pdr Mk. X, a gun acquired early on with excellent aiming speed and good penetration with a single-shot magazine. It is easy to hit even when not fully sighted, and can overwhelm the opponent with its rate of fire.
The most efficient order of module research and installation is:
- Engine "GMC 6004 6-71A"
- Suspension "Valentine Mk. VI"
- Turret "Valentine Mk. XI"
- Radio "WS No. 19 Mk. I"
- If you want to use the main gun "QF 6-pdr Gun Mk. V early", research the gun before the radio.
If you are in a hurry to research the next vehicle, research instead:
- Suspension "Valentine Mk. VI"
- Turret "Valentine Mk. XI"
- Matilda.
| Strengths:
| Weaknesses:
|
Recommended Setup
The setup was designed to improve offensive capability and compensate for its weak mobility.
| Equipment | |
|---|---|
|  |
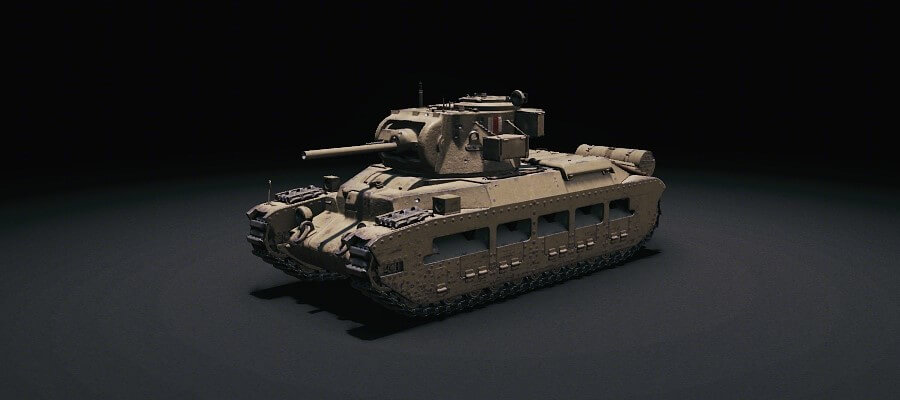
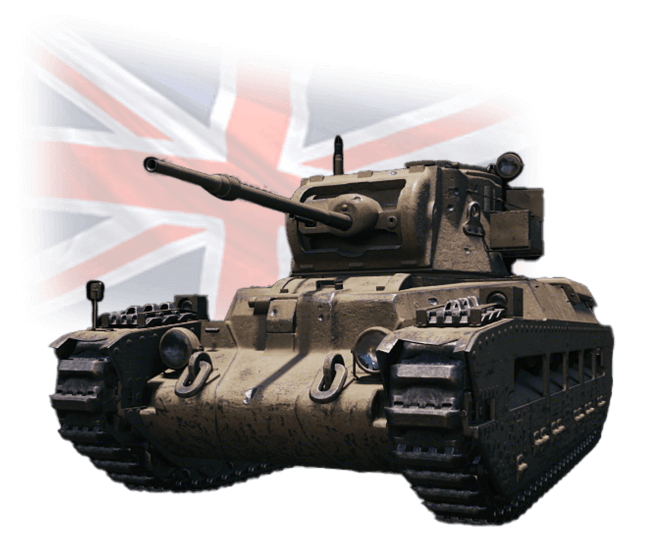
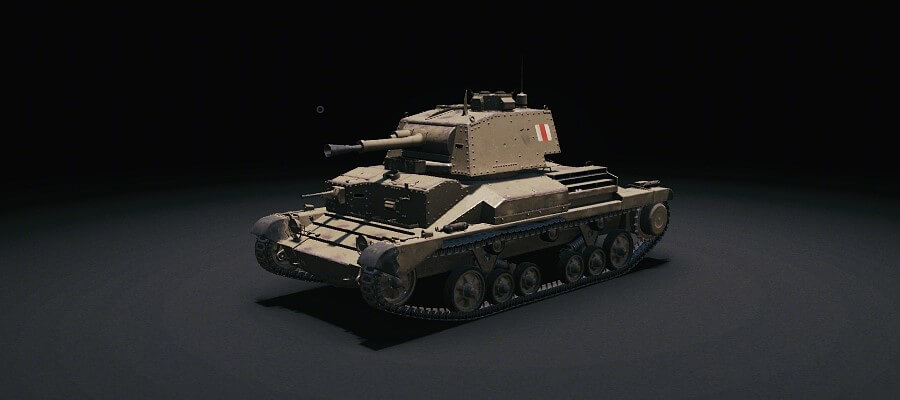
The
IV
![]() Matilda
is offensive in nature with excellent gun performance and thick armor at the expense of mobility. The Matilda's armor and high HP make it quite beefy. Combined with its final gun, the QF 2-pdr Mk. X-B, which has great penetration one of the highest DPM in Tier IV, the Matilda is capable of overwhelming firepower.
Matilda
is offensive in nature with excellent gun performance and thick armor at the expense of mobility. The Matilda's armor and high HP make it quite beefy. Combined with its final gun, the QF 2-pdr Mk. X-B, which has great penetration one of the highest DPM in Tier IV, the Matilda is capable of overwhelming firepower.
Although it has excellent armor, it is angled poorly, just like the Valentine, leading to fewer riochets. While other Tier IV vehicles have good penetration, the Matilda's high HP and survivability values ensure that you won't feel the effects much.
A choice of gun is the QQF 3-inch Howitzer Mk. I, a howitzer that is great against lightly armored vehicles. The QQF 3-inch Howitzer Mk. I trades aiming speed and penetration for high alpha damage. Depending on your play style, you may prefer this gun in some situations, but it is too limited and inflexible for us to recommend it as your default loadout. The final gun upgrade, the QF 2-pdr Mk. X-B, is a much more versatile option.
To fully unlock the potential of this vehicle, we recommend fully researching and installing all modules. The recommended order of research and installation is as follows:
- Engine "2x Leyland E164"
- Main gun "QF 2-pdr Mk. X-B"
- Suspension "Matilda Mk. IIA"
- Main gun "OQF 3-inch Howitzer Mk. I"
- Turret "Matilda Mk. IIA*"
- Radio "WS No. 19 Mk. II"
Take note that while the "Matilda Mk. IIA*" turret can be installed without researching the third suspension "Matilda Mk. IIA", it will hit maximum load limit, affecting traverse speed and preventing the installation of other modules.
If you are in a hurry to research the next vehicle, you can do so in the following order:
- Engine "2x Leyland E164"
- Main Gun "QF 2-pdr Mk. X-B"
- Cavalier.
| Strengths:
| Weaknesses:
|
Recommended Setup
The setup was optimized for offensive power while mitigating its low mobility.
| Equipment | ||
|---|---|---|
| |  |
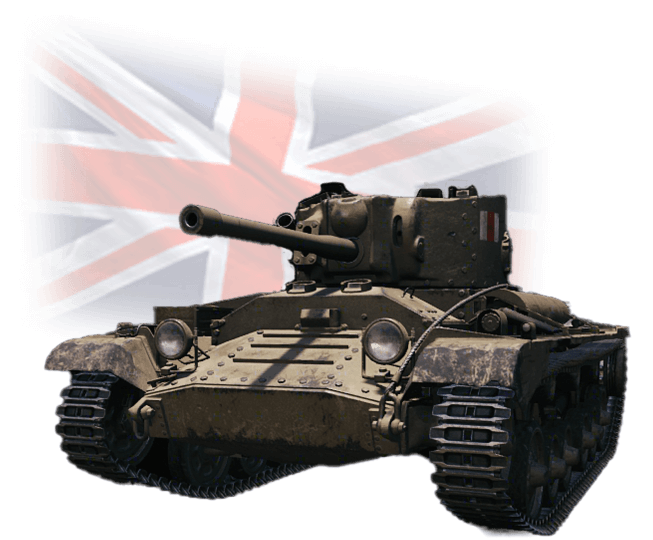
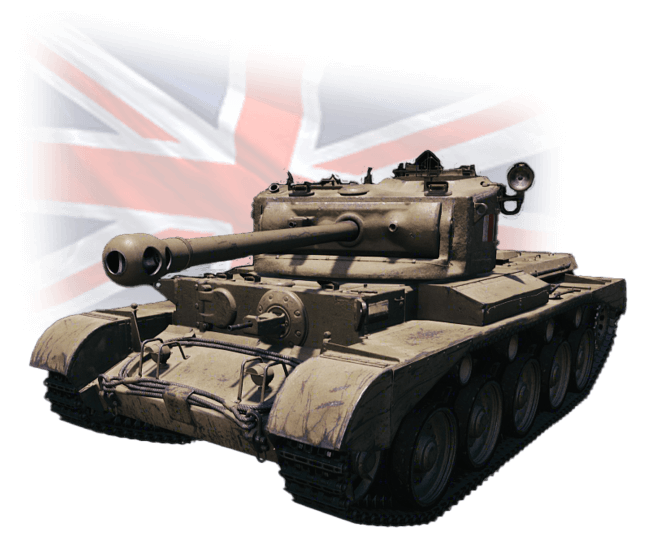
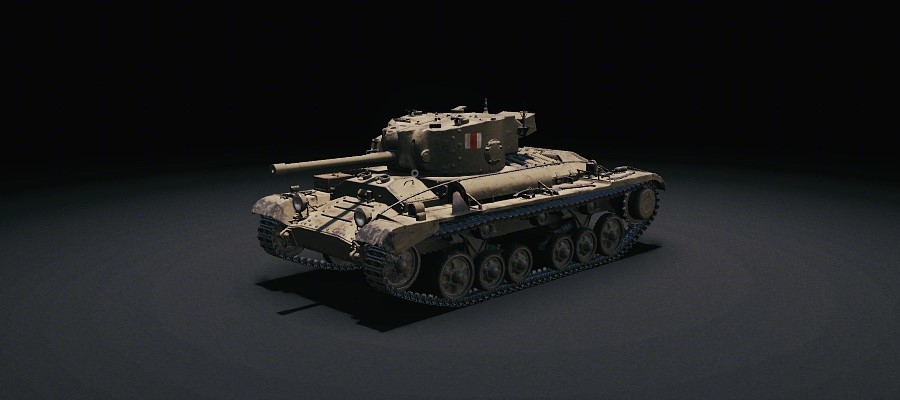
The
V
![]() Cavalier
marks a shift in how the vehicles in this tech tree are played. The armor of the three tanks from this vehicle to the
VII
Cavalier
marks a shift in how the vehicles in this tech tree are played. The armor of the three tanks from this vehicle to the
VII
![]() Comet
is unreliable. The Cavalier's maneuverability is an improvement to its predecessors, so much so that you can almost play it like a medium tank.
Comet
is unreliable. The Cavalier's maneuverability is an improvement to its predecessors, so much so that you can almost play it like a medium tank.
There are three guns to choose from: the QF 6-pdr Gun Mk. V, a main gun with excellent penetration and aiming speed at the expense of DPM. The 75 mm Gun Mk. V, a main gun with superior DPM at the expense of penetration. The 3.7-inch Howitzer is a howitzer that sacrifices both penetration and aiming speed for high alpha damage that excels against sparsely armored vehicles. Each gun has its distinct profile. In most cases, the 75 mm Gun Mk. V has a good balance, but the low penetration of regular ammunition leaves something to be desired unless you're using plenty of premium ammunition. Otherwise, the QF 6-pdr Gun Mk. V serves well with respectable penetration and aiming speed.
Here's the recommended research order:
- Suspension "A27"
- Main gun "QF 6-pdr Gun Mk. V"
- Engine "Nuffield Liberty Mk. IVA"
- Turret "A24 Vauxhall"
- Radio "WS NO. 19 MK. II"
You should research suspensions first to increase the Cavalier's maximum load weight to fit the other modules.
Even if you are in a hurry to research the next tier vehicles, we recommend researching and installing the above modules, except for the main gun QF 6-pdr Gun Mk. V, to easily earn your way to the
VI
![]() Cromwell
.
Cromwell
.
| Strengths:
| Weaknesses:
|
Recommended Setup
The setup is designed to maximize mobility and offense.
| Equipment | ||
|---|---|---|
|  |  |
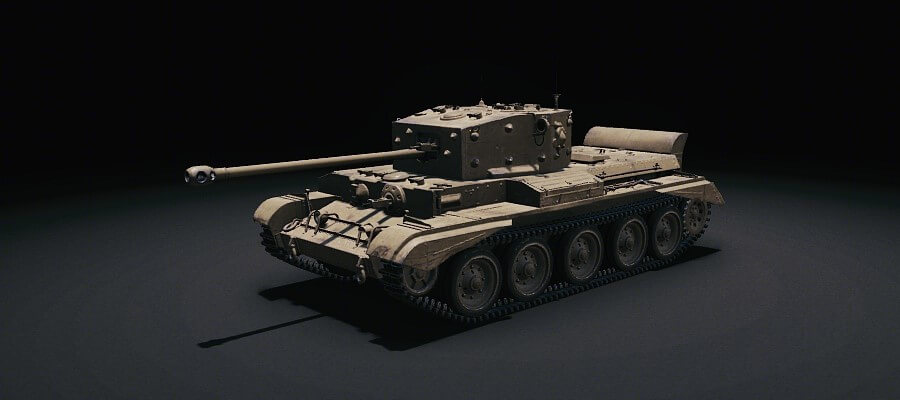
The
VI
![]() Cromwell
is an all-purpose support vehicle with outstanding mobility and excellent accuracy.
Cromwell
is an all-purpose support vehicle with outstanding mobility and excellent accuracy.
The Cromwell has a quick acceleration, high top speed, and handles turns easily, allowing it to act alongside light tanks, making it a versatile vehicle that can respond flexibly to changing situations. On the other hand, its armor thickness leaves much to be desired, and almost all of it is poorly angled, so don't rely on ricochets. A direct hit almost always means you're taking damage. However, the side armor is over 30mm, so if you adopt a defensive position like side-scraping, you can hope for a lucky ricochet from small to medium caliber guns. Choose your battles and use terrain to your advantage.
For the main gun, aim to mount the 75 mm Vickers HV. It has a very high DPM with minimal drawbacks. However, the gun dispersion during movement is rather large, so don't expect to be accurate on the move. Make sure to stop and aim before firing.
Until you can research the 75 mm Vickers HV, we recommend using the QF 6-pdr Gun Mk. V or the 3.7-inch Howitzer. The 75 mm Gun Mk. V also has excellent DPM and alpha damage, but it lacks penetration and may not be able to penetrate even medium tanks of the same tier.
The order in which modules should be researched and installed:
- Suspension "A27M"
- Engine "Rolls-Royce Meteor"
- Turret "Cromwell Mk. IV"
- Engine "Rolls-Royce Meteor Mk. IVB"
- Main gun "75 mm Gun Mk. V" (research only)
- "75 mm Vickers HV" (main gun)
- Radio "S NO. 19 MK. III"
You should always research suspensions first because the Cromwell starts out at maximum load limit with no leeway for other modules. If you want to use the 3.7-inch Howitzer, install it between steps (4) and (5).
| Strengths:
| Weaknesses:
|
Recommended Setup
The setup was designed to maximize mobility and offensive capability.
| Equipment | ||
|---|---|---|
| | |
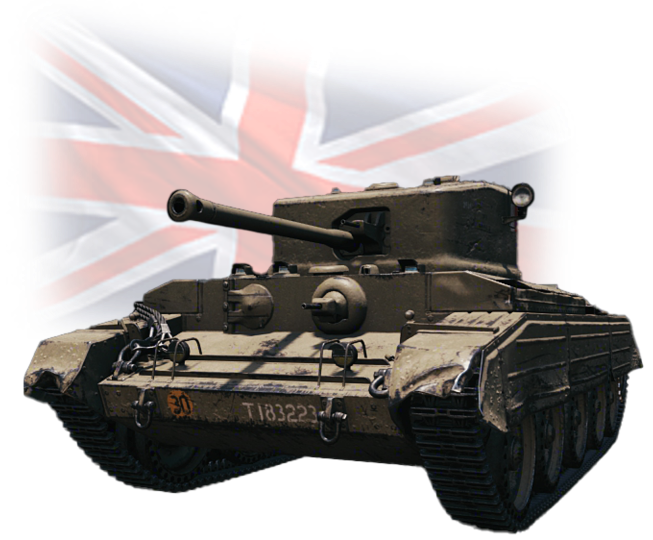
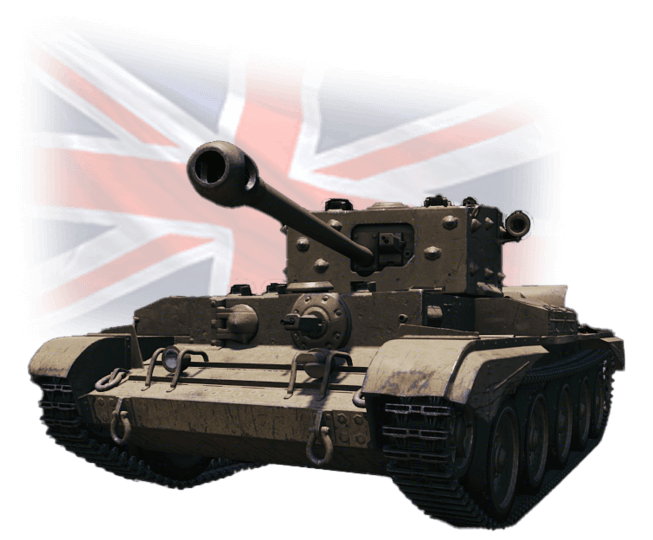
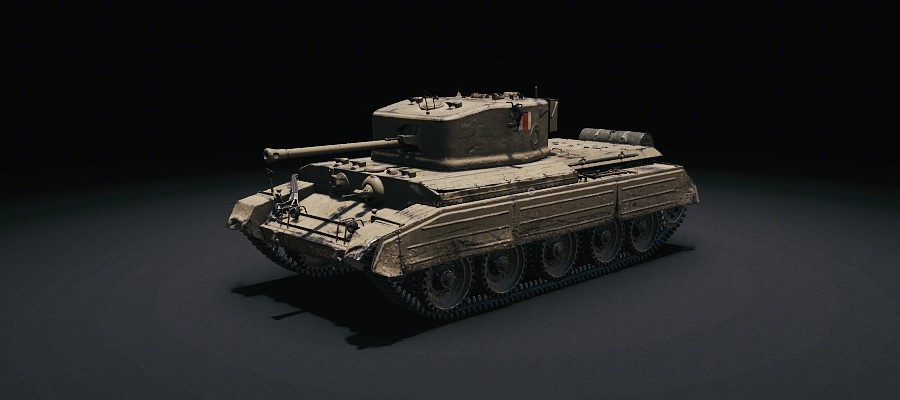
The
VII
![]() Comet
has excellent mobility and offensive capability, making it a versatile support vehicle that can flexibly respond to a variety of situations.
Comet
has excellent mobility and offensive capability, making it a versatile support vehicle that can flexibly respond to a variety of situations.
Compared to its predecessor, the Comet has improved spread and accuracy, and its depression angle has been increased to -12 degrees, making it easier to fight from ridgelines. It has one of the highest DPM of any medium tank in its tier, allowing it to deliver high firepower, even if the penetration and alpha damage are a bit low for a Tier VII tank. While it has very respectable maneuverability for a medium tank, it can't compare to the
VI
![]() Cromwell
.
Cromwell
.
To fully unlock the potential of this vehicle, we recommend fully researching and installing all modules. The recommended order of research and installation is as follows:
- Engine "Rolls-Royce Meteor Mk. IVB"
- Suspension "A34A"
- Turret "Comet Mk. I"
- Main Gun "OQF 77 mm Gun Mk. II"
- Radio "WS NO. 22"
| Strengths:
| Weaknesses:
|
Recommended Setup
Some changes were made from Cromwell's setup, but largely the same. Prioritize speed and firepower since armor is already lacking.
| Equipment | ||
|---|---|---|
| |  |
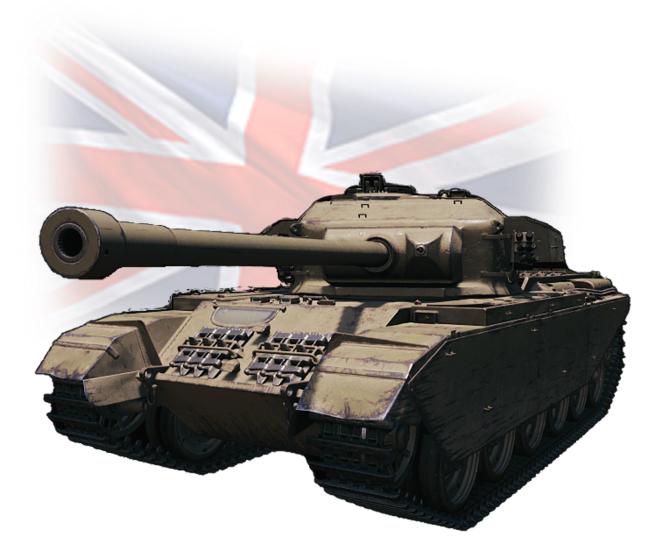
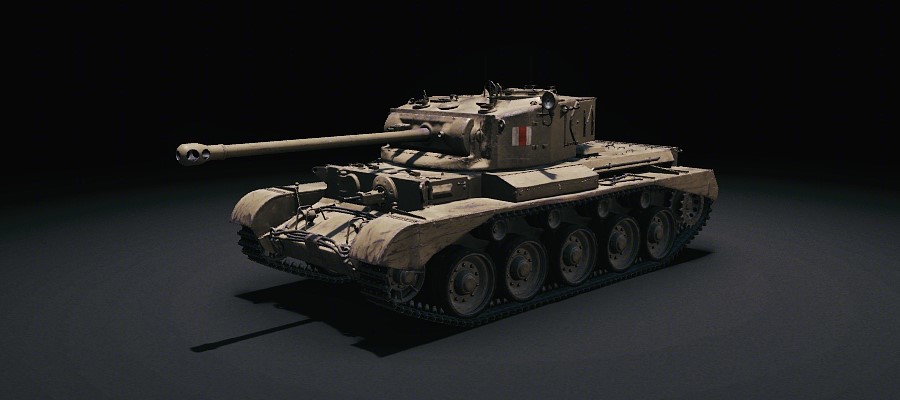
Starting with the
VIII
![]() Centurion Mk. I
, you will notice that the turret armor has become thicker and the "hull-down position" can be used effectively. This is a long-range medium tank with excellent turret armor and accuracy that stays competitive even against Tier VIII vehicles.
Centurion Mk. I
, you will notice that the turret armor has become thicker and the "hull-down position" can be used effectively. This is a long-range medium tank with excellent turret armor and accuracy that stays competitive even against Tier VIII vehicles.
The Centurion Mk.I has one of the best penetration and accuracy values of any Tier VIII medium tank, as well as a -10 degree depression angle. Additionally, it has a high HP pool for a medium tank, which allows it to withstand quite a few hits. Although it lacks the nimbleness of its predecessors, it still has average mobility for a medium tank. Another feature is its extremely large view range.
The frontal armor of the turret, however, can be penetrated by high penetration rounds from tank destroyers and top-tier vehicles. In addition, the hull armor is very thin, and the silhouette is large for a heavy tank. The side armor is only 50.8mm thick, so although it is possible to adopt a defensive position by side scraping, how you angle this tank is important to force a ricochet.
Aim to research and install all final modules. The order of recommended research and installation is as follows:
- Engine "Rolls-Royce Meteor Mk. IVB"
- Main Gun "OQF 17-pdr Gun Mk. VII"
- Suspension "Centurion Mk. III"
- Turret "Centurion Mk. III"
- Main Gun "OQF 20-pdr Gun Type A Barrel"
- Engine "Rolls-Royce Meteor Mk. IVC
- Radio "SR C42"
| Strengths:
| Weaknesses:
|
Recommended Setup
The basic setup is the same as Comet's, with a setup that enhances mobility and attack potential.
| Equipment | ||
|---|---|---|
| | |
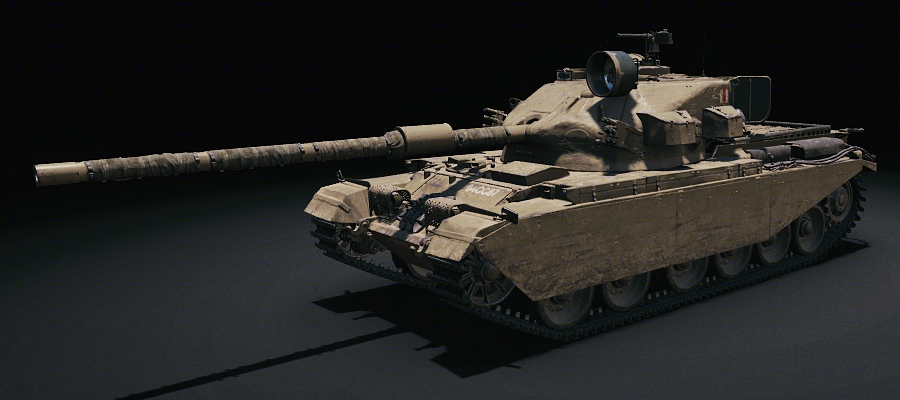
The
IX
![]() Centurion Mk. 7/1
handles almost the same as the
VIII
Centurion Mk. 7/1
handles almost the same as the
VIII
![]() Centurion Mk. I
as a fire support vehicle from a hull-down position.
Centurion Mk. I
as a fire support vehicle from a hull-down position.
The Centurion Mk. 7/1 is like the Mk. I, with improved HP, maneuverability, and offensive capability in line with other Tier IX vehicles. One of the best features of this vehicle is the 105 mm Royal Ordnance L7A1, a main gun with good penetration and high alpha damage with regular APCR rounds and higher alpha damage with premium HESH rounds. This gun's regular APCR ammunition has a damage of 390, a penetration of 268mm, and a velocity of 1478m/s, making it one of the best guns in Tier IX, with high accuracy to boot! Premium HESH rounds have a reduced penetration of 210mm, but their single-shot damage increases to 480 - the highest in Tier IX. It has the same high gun dispersion during movement as its predecessors, but despite that, it can accurately aim even at medium to long distances.
It should be noted that the turret's armor has not improved at all. In addition, the armor in the upper front of the hull has been greatly increased, but while the front hull can withstand the occasional shell, direct hits still pose a credible threat.
To fully unlock the potential of this vehicle, we recommend fully researching and installing all modules. The recommended order of research and installation is as follows:
- Main gun "OQF 20-pdr Gun Type B Barrel"
- Engine "Rolls-Royce Meteor Mk. IVC"
- Suspension "Centurion Mk. 9"
- Turret "Centurion Mk. 9"
- Main gun "105 mm Royal Ordnance L7A1"
- Engine "Rolls-Royce Griffon"
- Radio "SR C42"
| Strengths:
| Weaknesses:
|
Recommended Setup
This loadout maximizes mobility and attack performance.
| Equipment | ||
|---|---|---|
| | |
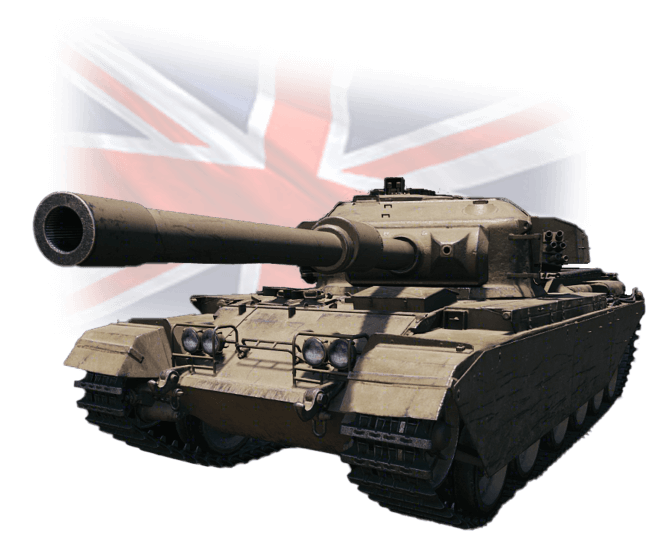
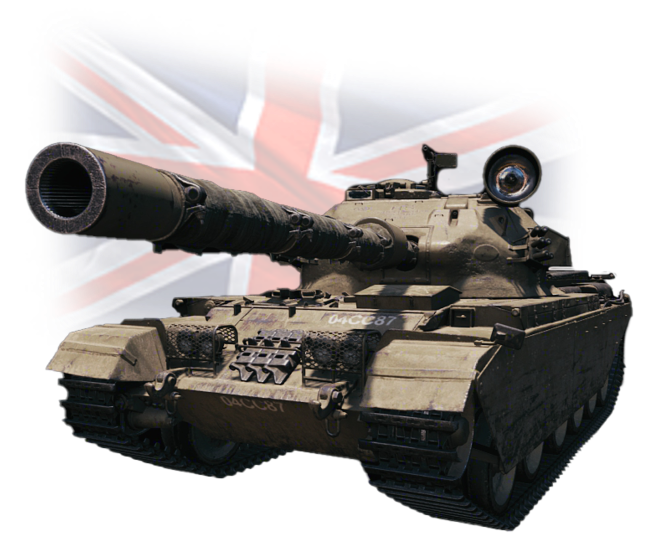
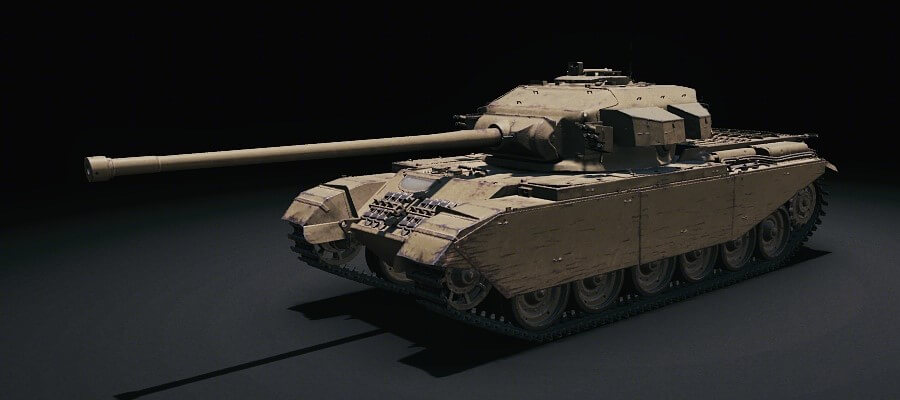
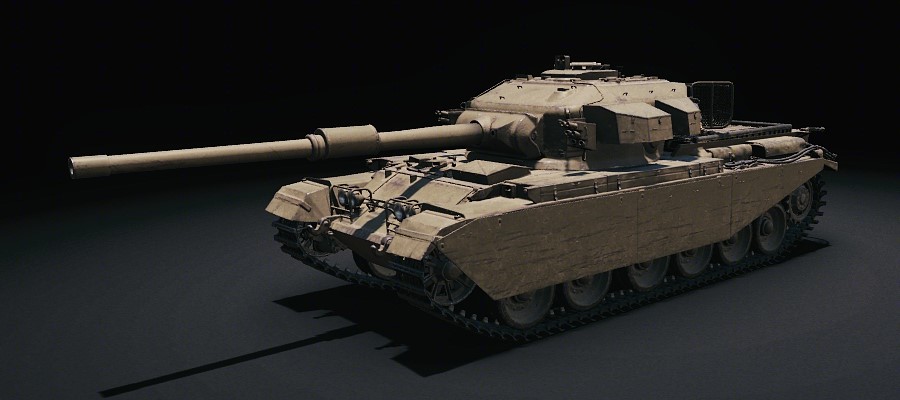
The
X
![]() Centurion Action X
is a great, all-round vehicle, making it a flexible option for any battle situation.
Centurion Action X
is a great, all-round vehicle, making it a flexible option for any battle situation.
Off the bat, you'll notice the improved HP, maneuverability, and offensive capabilities that are in line with other Tier X vehicles. Premium ammunition now includes high penetration HEAT ammunition, similar to that of standard vehicles, instead of HESH ammunition. This allows it to finally deal with heavily armored vehicles.
The weaknesses haven't changed, though. Armor thickness has increased so minimally that it has effectively remained the same, leaving the side of the turret a juicy spot for your opponents to land a round. This can be heavily mitigated by adopting the standard hull-down position and firing from cover.
| Strengths:
| Weaknesses:
|
Recommended Setup
The basic setup is the same as the Centurion Mk. 7/1; mobility and firepower are your friends.
| Equipment | ||
|---|---|---|
| | |
Recommended Order of Acquisition for Crew Perks/Skills
The number of crew required for the vehicles in the
X
![]() Centurion Action X
tree is shown in the table below; the
II
Centurion Action X
tree is shown in the table below; the
II
![]() Cruiser Mk. II
requires five crew members, but that will eventually be reduced to four as you go up the tree.
Cruiser Mk. II
requires five crew members, but that will eventually be reduced to four as you go up the tree.
| Crew \ Tier | II | III | IV | V | VI | VII | VIII | IX | X |
|---|---|---|---|---|---|---|---|---|---|
| Commander | Gunner Radio |
Radio |
|||||||
| Gunner | |||||||||
| Driver | |||||||||
| Radio Operator | |||||||||
| Loader | Radio |
Radio |
Radio |
If you use the same crew for every vehicle, you may end up with a surplus of radio operators when you unlock the
X
![]() Centurion Action X
. With this in mind, we recommend to have each crew member acquire perks/skills according to the table below.
Centurion Action X
. With this in mind, we recommend to have each crew member acquire perks/skills according to the table below.
| Crew \ Order | 1st | 2nd | 3rd | 4th |
|---|---|---|---|---|
| Commander |  |
 |
 |
 |
| Gunner |  |
|
|
|
| Driver |  |
|
|
|
| Radio Operator | |
|
|
 |
| Loader | |
|
|
 |
Prioritize the "Sixth Sense" perk for your commander as one of the first perks you pick up, then follow that up with skills for the gunner and driver that enhance firepower. "Snap Shot" and "Smooth Ride" will help mitigate the large gun dispersion suffered by tanks from the Cromwell to the Centurion Action X. The effects of these skills may seem minimal, but they nevertheless improve the performance of most vehicles in this line of tanks. For the rest of the crew, the "Camouflage" skill will help to improve concealment values.
Notice that the perk "Brothers in Arms" is the third skill/perk listed for all crew members. If you have enough gold, we recommend learning the skills in the fourth row first. Since the Brothers in Arms perk will only kick in once you reach 100%, you can use gold to reset the third perk/skill slot, then choose "Brothers in Arms" as the third perk/skill. Then, you can start learning the fourth skill again.
Interested in the
X
![]() Centurion Action X
tree after knowing more? Why not take this opportunity to start your tech research? For more information about On Track missions, check out the link below!
Centurion Action X
tree after knowing more? Why not take this opportunity to start your tech research? For more information about On Track missions, check out the link below!