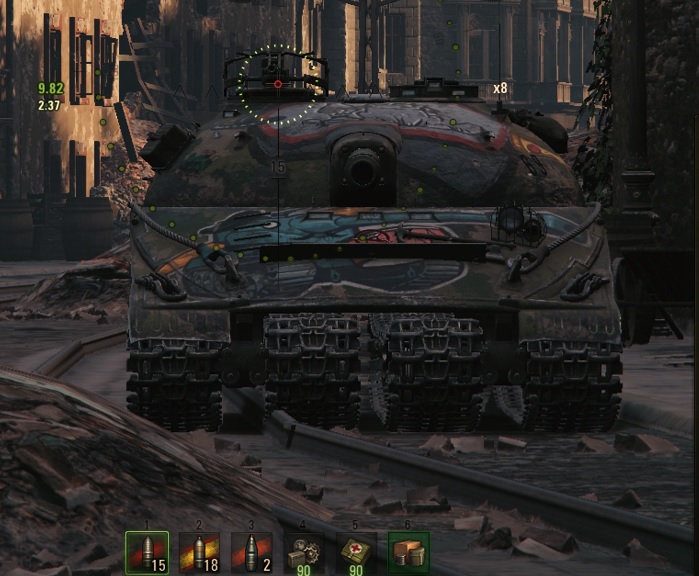
Dealing with Meta - Object 279(e)
Hopefully the last series helped a lot with looking at dealing with "The Meta Tank" in the T95/FV4201 Chieftain. Another tank you'll be dealing with a lot of is the
 X
X
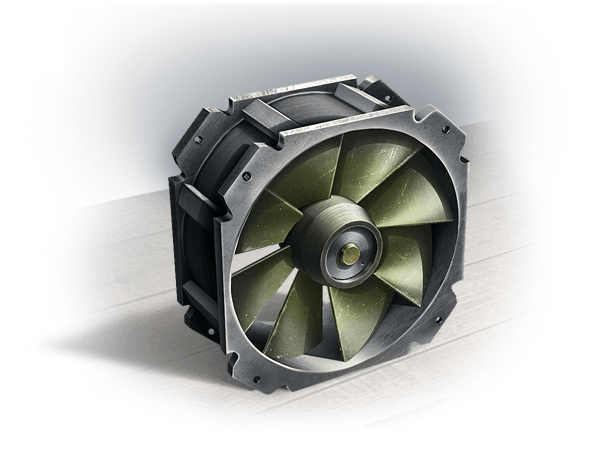
![]() Object 279 early
!
Object 279 early
!
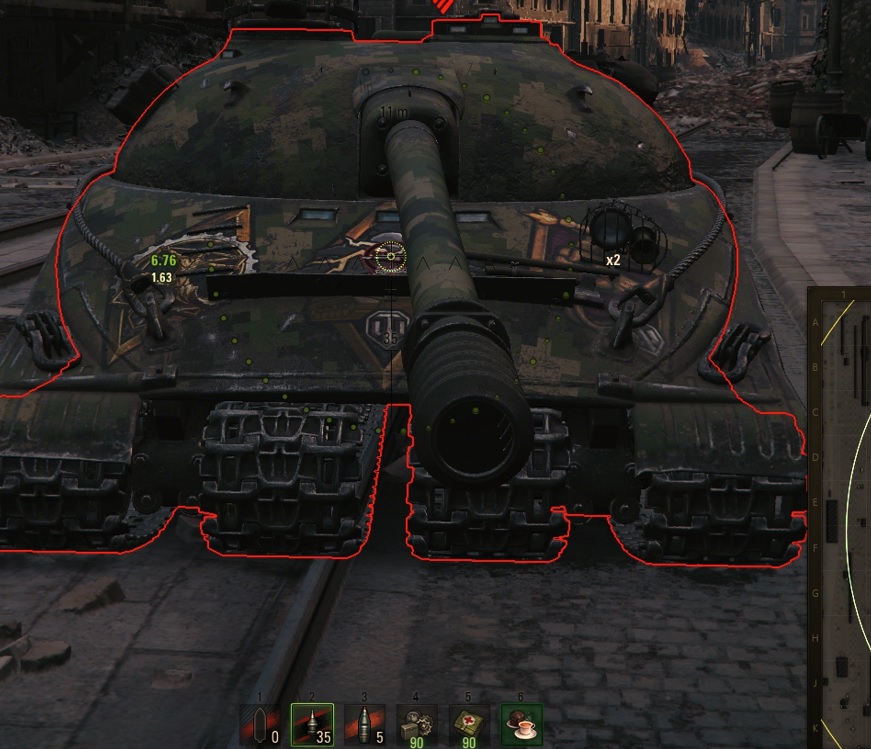
At first glance, the vehicle looks intimidating. With a sizable HP pool, no lower glacial plate, and a menacing gun, it can be quite infuriating watching your shots bounce off this vehicle time after time.
However, just like anything in life, there's nothing you can't do if you put your mind to it. And the best way to learn about how to damage the Object 279(e) is by versing it until you understand where and why the weak points exist! Knowledge is power, after all.
As per usual, the cupolas are another weak point - two exists on the Object 279(e). However, it's important to note it is best to aim for this one (the left side cupola on the tank) because it's the larger of the two. It's very important to note that the machine gun on top of the cupola is smaller and the machine gun port is not part of the cupola.

If the 279(e) is on flat ground, the upper hull can be damaged by a good roll from highly effective rounds (looking about 320+ to guarantee a 50/50).
Pay attention! The lower and closer to the centre of the vehicle (as per picture below), the less armour there is.
This is where you'll see the Object 277 aiming most of the time when fighting an Object 279(e) head on.

Tall tanks (like the
 X
X
![]() E 100
or the
E 100
or the
 X
X
![]() Super Conqueror
) have the high ground advantage, and at that point, it's all over for the 279(e), no matter how much you underestimate his power.
Super Conqueror
) have the high ground advantage, and at that point, it's all over for the 279(e), no matter how much you underestimate his power.
Taller tanks can easily go through the upper plate as the effective angling is reduced, and the effective armour value reduces to around 230mm - and it'll become a breeze for you to just absolute ruin the dreaded 279(e).
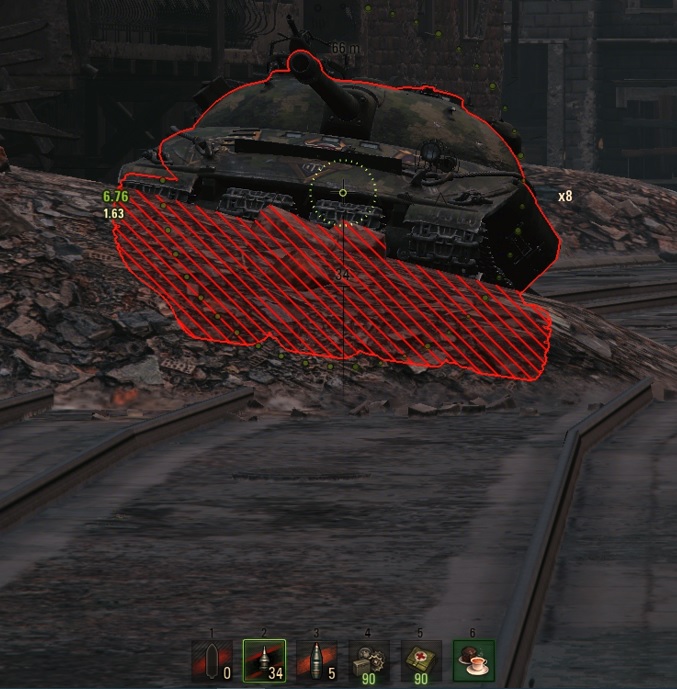
But the most dreaded situation is when a 279(e) is above you, or artificially increasing the effective value by angling the tank up, it becomes very difficult to try and damage the Object 279(e). There is, however, one slight weak spot that can be shot at - which is definitely worth having a go at if you cannot hit the cupola, or get a good shot on the upper plate.
The cusp/lip of the plate (where the hull just meets where the tracks) has a small and hard to hit weak spot when the tank is rocking up and down. It is easier to hit with HEAT rounds (as you can go through the underside of the vehicle) over APCR, but as you can see, it's definitely doable still from tanks like a Super Conqueror.
Situational Tank #2 - Leopard 1
|
Tank
|
Recommended Equipment
|
Rationale
|
|---|---|---|
|
Leopard 1 |
|
|
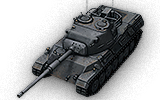
Utilised by teams whenever they require extreme accuracy at distance, alongside the ability to have a turret, the
X
![]() Leopard 1
can absolutely terrorise the opposition from a position where it remains unlit and can punish tanks that are not putting themselves behind cover quickly. However, just like the AMX 50 B in the previous entry, it shares a lot of downsides, which is why it's heavily situational and dependent on why teams are running it.
Leopard 1
can absolutely terrorise the opposition from a position where it remains unlit and can punish tanks that are not putting themselves behind cover quickly. However, just like the AMX 50 B in the previous entry, it shares a lot of downsides, which is why it's heavily situational and dependent on why teams are running it.
Consider it the ultimate sniper tank, covering your fellow clanmates while dishing out a world of hurt during a brawl.
So why would you use the Leopard 1?
- Offensive Sniper - An offensively orientated substitute for the
 X
X
 Strv 103B
, as it is more mobile, higher platform, and a turret to help the tank stay stationary (important when utilising camouflage mechanics!)
Strv 103B
, as it is more mobile, higher platform, and a turret to help the tank stay stationary (important when utilising camouflage mechanics!) - Top Gun Handling - An amazing gun with fantastic shell velocity, good alpha, and decent penetration value
- Sector Control - To help cover a large area from a distance, by punishing flanks, providing cover fire for an overmatched batch of vehicles, or to help take pot shots into tanks that are overpeeking

Of course, there's a lot of problems with the Leopard 1 as well:
- Armour? What armour? - If you bounce a shot in this vehicle, you've been blessed by RNG today, because this tank is more paper than metal!
- Lack of brawl presence - with fragile modules, a lacking HP pool, and no armour, good luck taking this tank into a good old fashioned fisty-cuff fight.
- Ability to manage your presence in a brawl - in an extended fight and with frantic communications, you need a cool head and ability to see which targets are important, and have a fantastic insight on what's the threat, and know when to drive into battle to get your (minimal) HP into the fight.