Recon Mission 2022: The Results

Commanders!

After two weeks of intense battles on six map candidates, the Recon Mission event is over. We appreciate your solid input into shaping the future of World of Tanks. Over 17,792 players across Asia Pacific tested out the proposed map prototypes, and 10,236 of them found time to complete the questionnaires. In total, more than 322,080 Recon Mission battles were played in APAC. And we’re happy to report that everything went smoothly: we received valuable feedback, gathered loads of battle statistics, and can now officially name the two most successful locations: Aquila and Anykeyyevka.

Recon Mission Overview

Expand

During the event, players could test out six map candidates, three of which were modified prototypes from last year, while the other three were brand new. After playing at least six battles on a map, you could complete a detailed questionnaire, pointing out that map’s strengths and weaknesses.

Collapse

The Map Roster

During Recon Mission, players had the opportunity to test out the following maps:

  • Airshipyard
  • Anykeyyevka
  • Aquila
  • Canyon
  • Far East
  • Klostertal

You can learn more about each of these location prototypes in the announcement article.

The Winning Locations

To determine which map prototypes to develop further, we looked at:

  • Player feedback and their aggregate evaluation of every map
  • Gathered data on gameplay balance and variety
Light tanks  Medium tanks  Heavy tanks  Tank destroyers  Self-propelled guns

Aquila

Based on the criteria mentioned above, the Aquila map came out on top. Players really liked the abundance of tactical choices it offered and the fact that every vehicle type could find a niche for themselves in every major part of the map. Their reaction to the size of the location (1,200 m x 1,200 m) was also positive. Moreover, players liked that losing teams could often turn the tide of battle if they were strategic with their last line of defense. The average battle lasted 7 minutes and 40 seconds on Aquila, and the percentage of draws was very low. Therefore, it’s no wonder that the majority of those who completed the questionnaires appreciated the concept and wanted this location in the game.

Still, there’s always room for improvement. For example, there was a slight imbalance in the win rate, which favored the northern team. With your help, we identified a couple of problematic positions at the root of the issue.

1. This position offers fewer opportunities for control of the map than the symmetric position of the northern team.

2. The southern team lacks a convenient spot to meet opponents rolling down the hill slope.

We will make the Aquila map part of our production pipeline and refine it, aiming for release in 2023 (after we finish polishing the Oyster Bay location).

Anykeyyevka

The Anykeyyevka map was a close second, and a lot of you were eager to see it become part of the Random Battles roster. As with Aquila, those who filled in the questionnaires appreciated the opportunities available to various vehicle types all over the map. In fact, Anykeyyevka was voted the most tactically versatile of all six prototypes. The percentage of draws here was higher than that on Aquila, but the win rate spread was smaller. However, this map needs to be “evened out” too, and several key places should be reshaped to deal with the edge that the southern side currently holds.

1. This spot allows the southern team to control the advancing enemy heavies more efficiently than its mirror counterpart.

2. One of the key firing positions provides more options compared to its equivalent on the northern side.

3. The southern team has an easier time making it up this hill.

We’ll consider this when we start upgrading Anykeyyevka to release quality—which should happen after we finish working on Aquila.

Interactive image. Hover the cursor over zones on the minimap to view additional information.
Anykeyyevka
Aquila

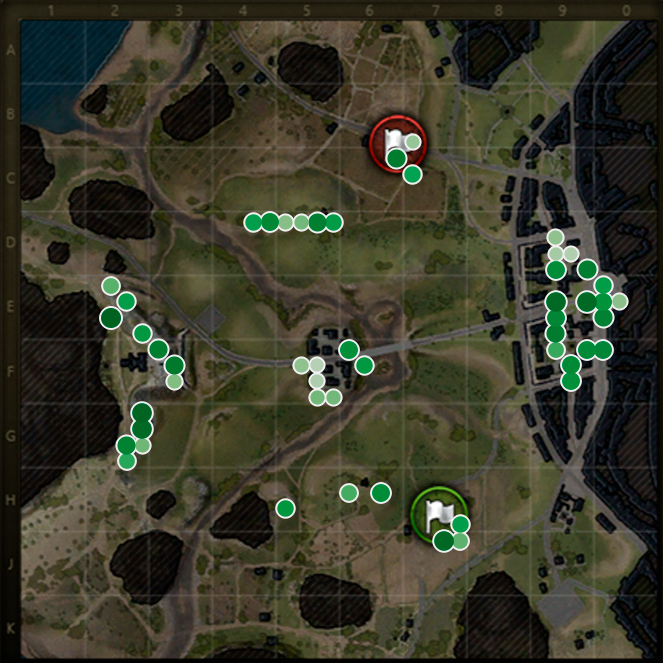
Here’s the main spot for clashes in heavily armored vehicles. Lots of defensible positions here with different elevations and firing distances.

From here, you can pin down opponents in the neighboring zones. You can also try to drive through into the enemy's rear.

A high-risk zone for medium and light tanks that offers a high reward, granting you control over a large portion of the map.

From these sniping positions, you can prevent excessive maneuvering by the red team.

From these sniping positions, you can prevent excessive maneuvering by the red team.

A zone for medium tanks that are able to play hull-down or even by exposing their "body" (provided they're sturdy).

A corner for the operators of super-fast light and medium tanks who play sharp. Little cover but plenty of excellent firing positions.

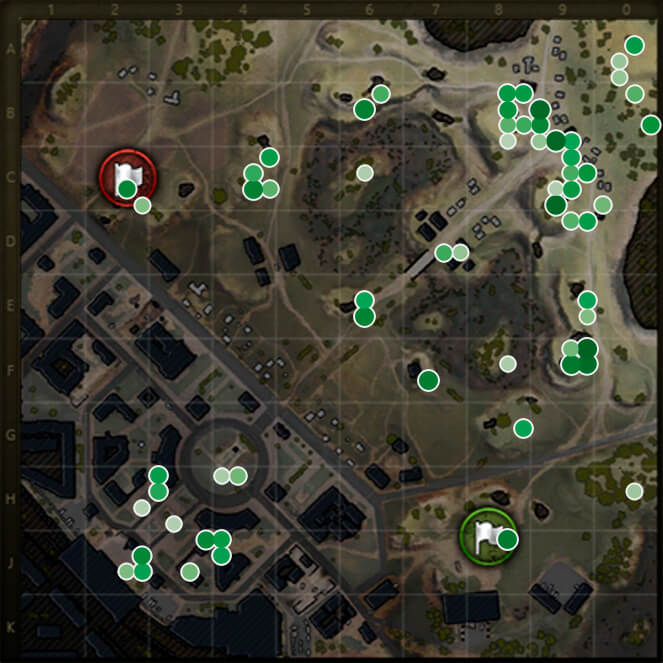
The battleground for heavily armored machines, with plenty of great defensive positions. From here, you also can contain enemy attempts to raid your rear.

This zone is great for spotting, especially when the battle begins, since you can track where the enemy vehicles are heading from their base. Lots of firing positions here that allow you to control the middle of the map.

This zone is great for spotting, especially when the battle begins, since you can track where the enemy vehicles are heading from their base. Lots of firing positions here that allow you to control the middle of the map.

Hold this point with medium tanks to spot and to fire at the enemy, maintaining your grip on the center of the location. Use cover, as return fire is to be expected.

Another place where medium tanks will be efficient. If your side wins here, you’ll control most of the map.

These sniping positions will suit weak-armored vehicles just fine.

These sniping positions will suit weak-armored vehicles just fine.

These sniping positions will suit weak-armored vehicles just fine.

These sniping positions will suit weak-armored vehicles just fine.

These sniping positions will suit weak-armored vehicles just fine.

These sniping positions will suit weak-armored vehicles just fine.

These sniping positions will suit weak-armored vehicles just fine.

These sniping positions will suit weak-armored vehicles just fine.

And Now for Some Analytics

The heat maps for the winning prototypes revealed that tankers really care about the tactical variety of gameplay and believe that every vehicle type should have a chance to shine. As you can see below, the dedicated directions and positions for every vehicle type are quite pronounced for both Aquila and Anykeyyevka. At the same time, every player has a lot of tactical options (the colors signifying the routes of different types of vehicles on the first set of maps appear to mix a lot).

Light tanks  Medium tanks  Heavy tanks  Tank destroyers  Self-propelled guns
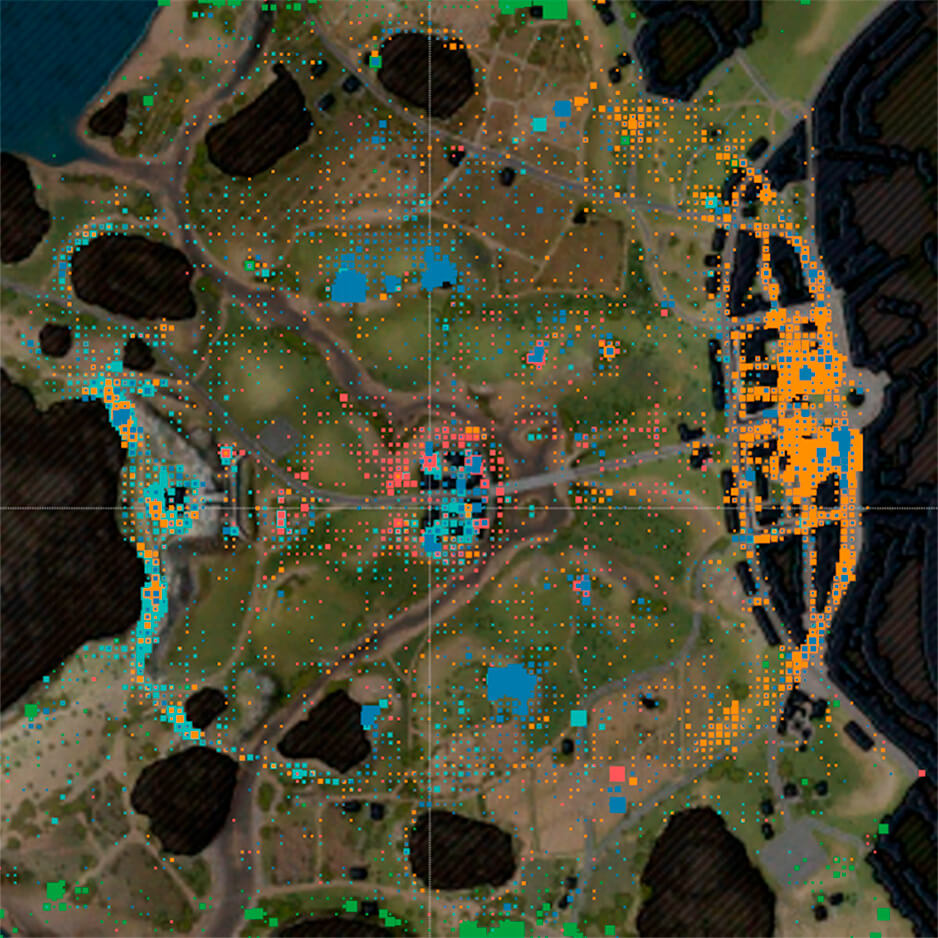
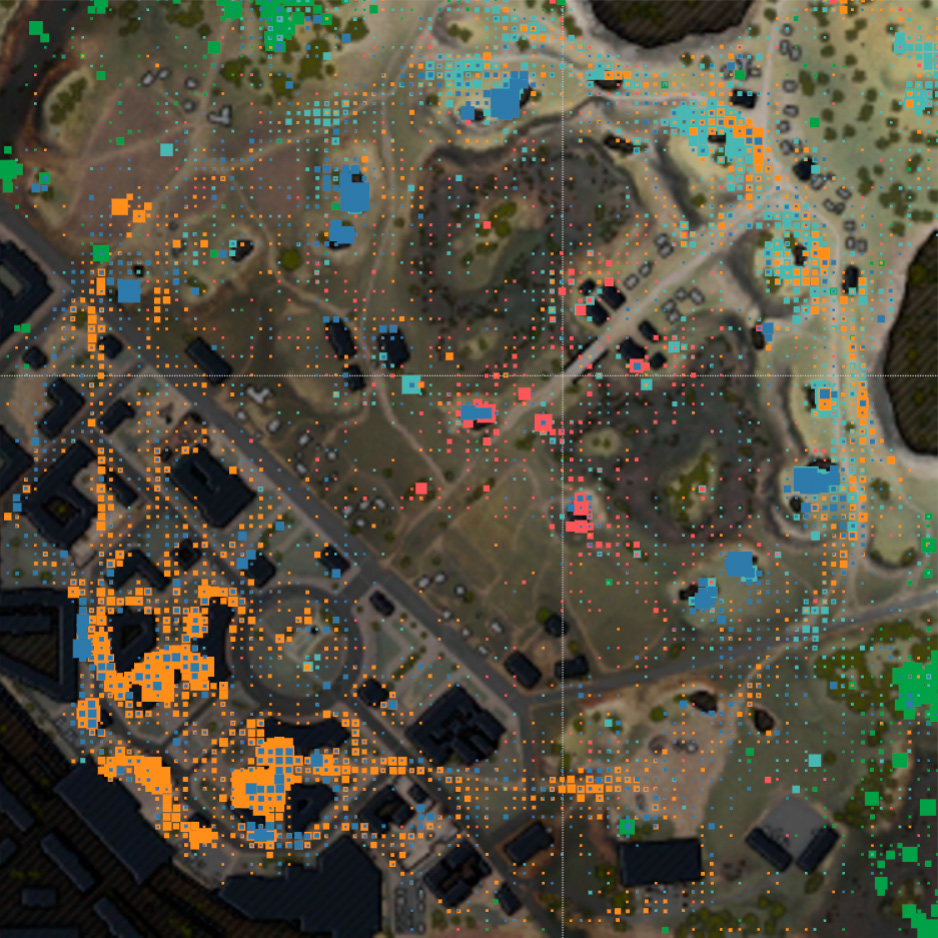
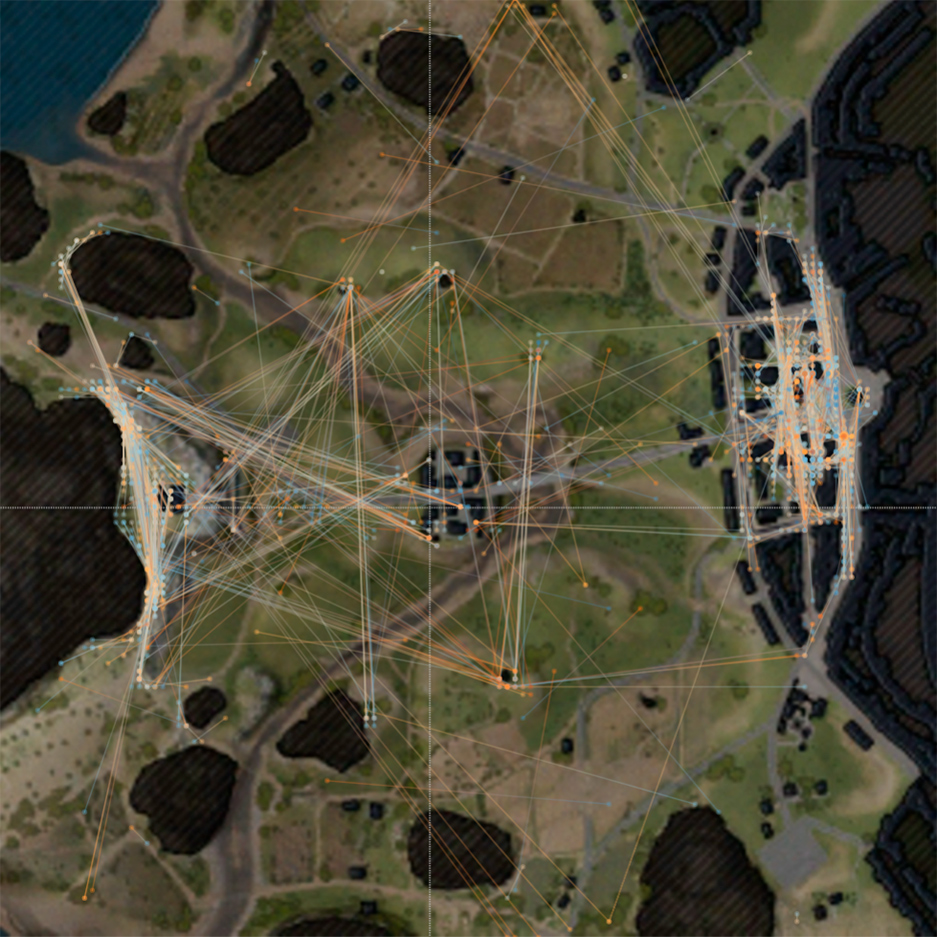
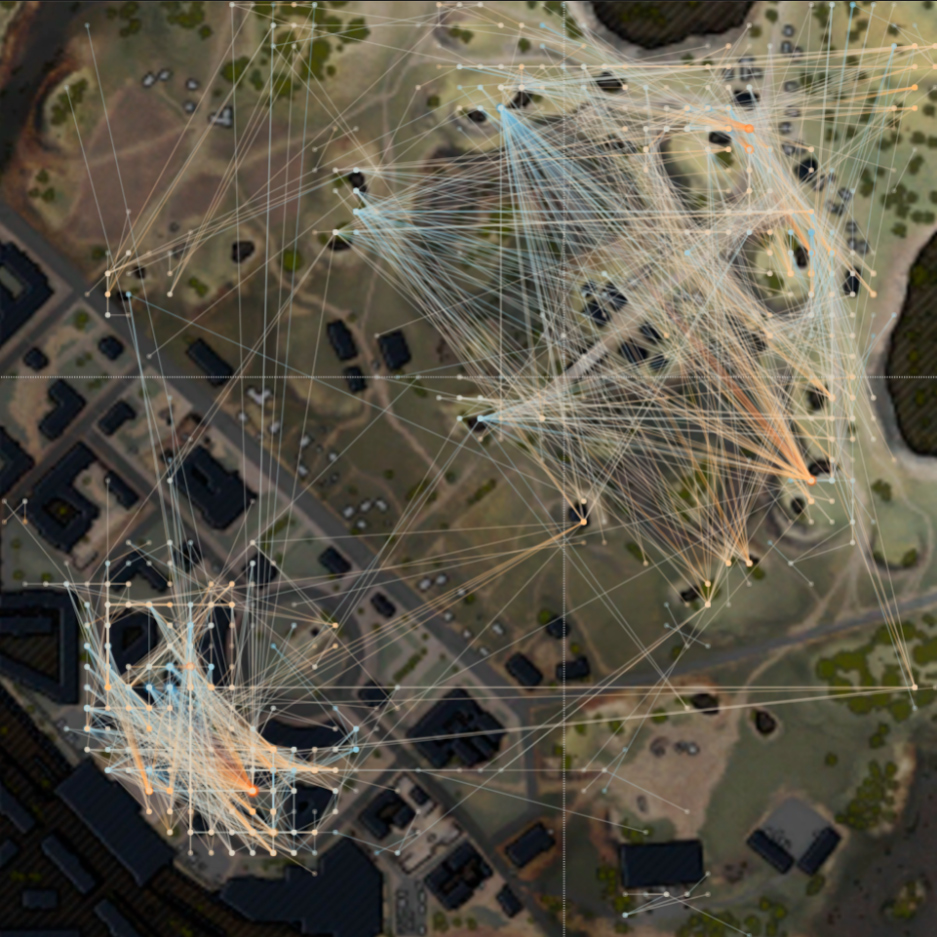
  • Heat Maps for Vehicle Types
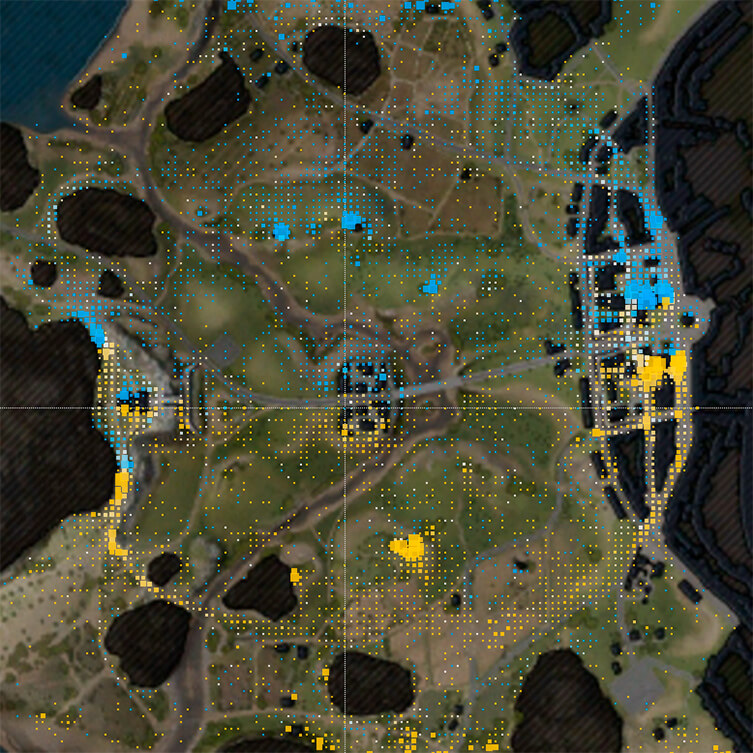
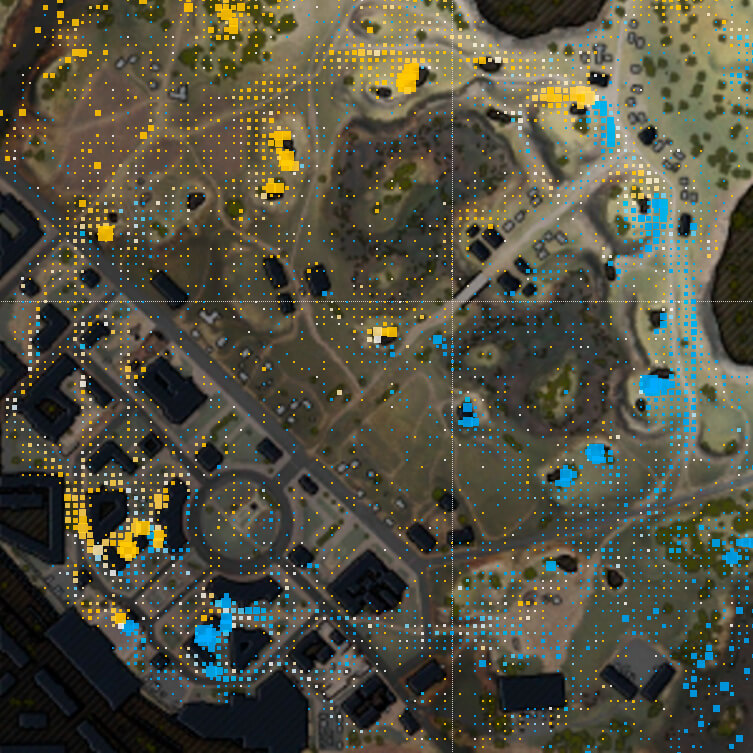
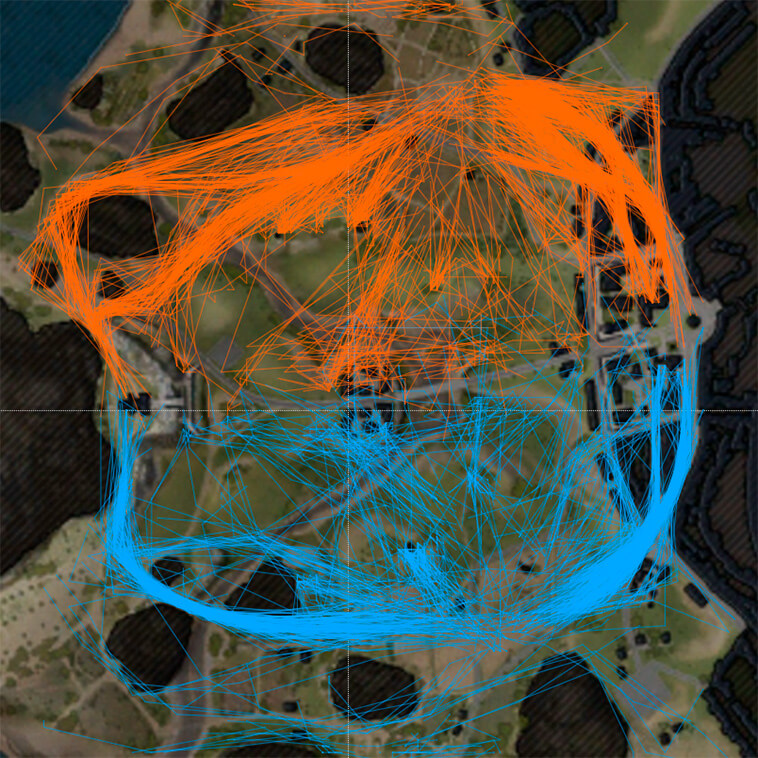
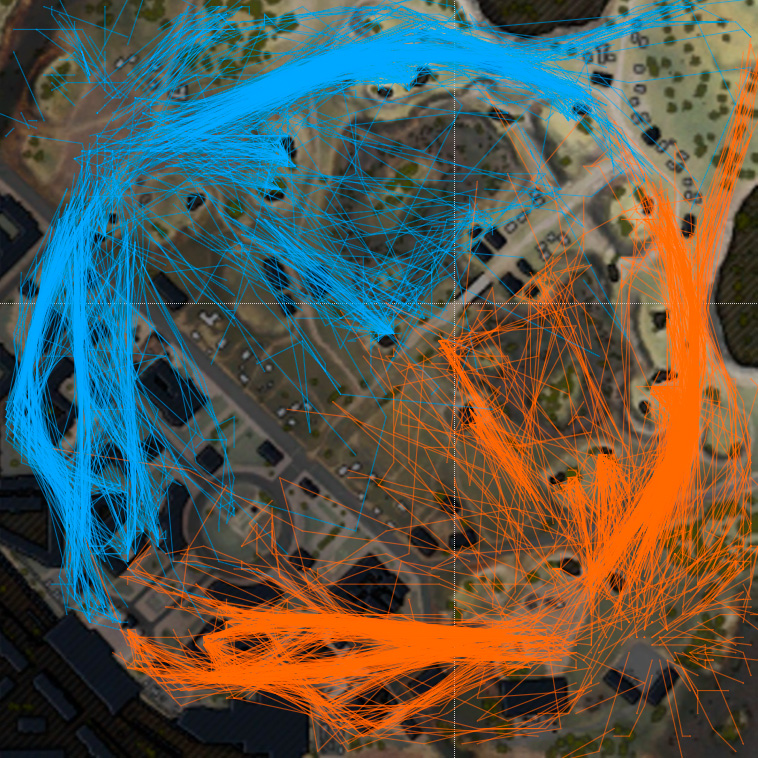
  • Heat Maps for Teams
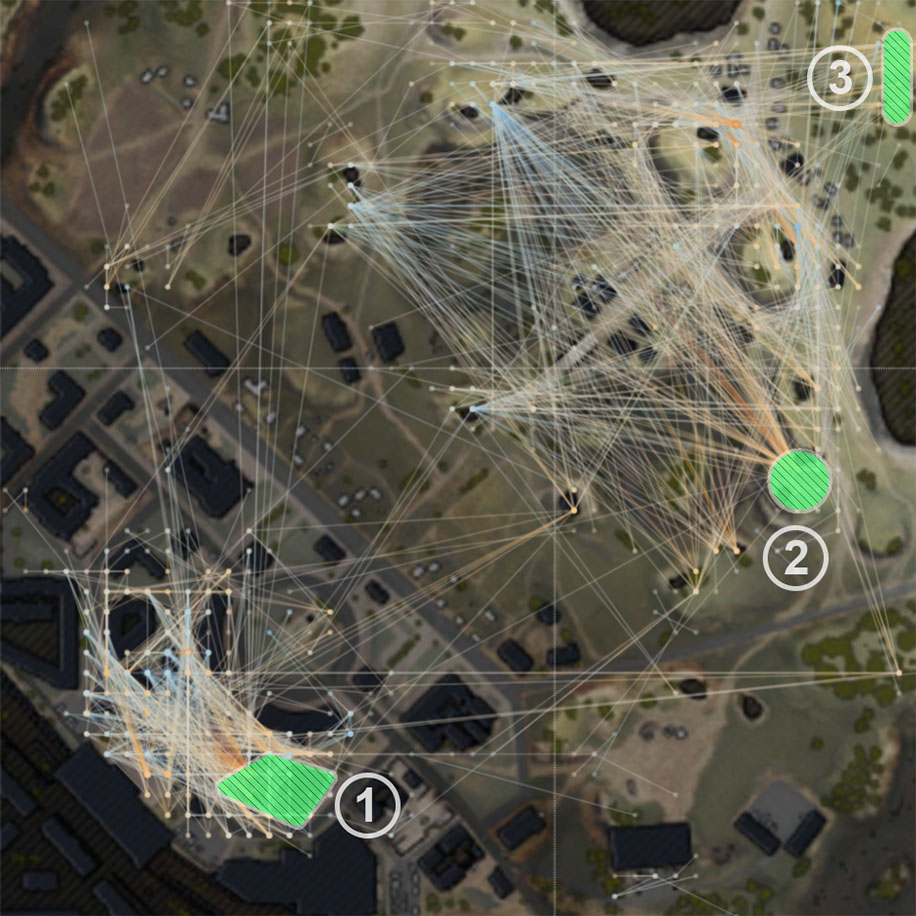
  • Maps of Firing Positions
  • Most Problematic Spots Marked by Players
  • Heat Maps for Movement from the Bases

Stay tuned for updates on the best maps from this event. We’ll share more news closer to their planned releases, including the finalized looks of these locations. We understand that you want to start playing on your new favorite maps ASAP. However, know that we want these locations to truly look their best and be well-balanced, so you can continue having fun on them for as long as possible. It takes a significant amount of time to bring a map to release quality, but we are working at top speed. In the meantime, we kindly ask for your patience and assure you it will be well rewarded. As a reminder, the first “graduate” of Recon Mission, the Outpost map, will enter Random Battles in September 2022 and the second, Oyster Bay, will arrive in early 2023.

Thank you once again for taking part in Recon Mission!

Close