KaRath's Campaign Diary, Part 2

Commanders!

As any Clan Wars veteran knows, the start of the campaign always sets the tone for the rest of the battles, so the first week of the Confrontation Global Map event was critical to the team's success. Here's how it all went down!

The First Night

Without personal Fame Point boosters in the equation, it definitely was a lot more "relaxing" in the sense that we didn't have to worry about getting them to a certain level before it was deemed too late, which is something I distinctly remember from the Renaissance campaign I played back in 2021.

We got off to a great start during the earlier timezones, with both of our two teams making some deep runs in our basic landing provinces, but were unable to secure land. However, we knew this was still early in the game, and that we had plenty of time to work on our teamwork and synergy —we would only get better from here.

However, progress definitely slowed to a crawl during the later timezones, and this was due to the number of available players we had. With less than twenty players online, we could only confidently fill one team, so we decided to alternate players in and out, instead of trying to risk forming two teams and overwhelming ourselves — a technical penalty this early on in the campaign would severely hurt our chances in the long run.

Common mistakes that we found ourselves making would usually be focus fire and getting our tanks to share HP (and this is something that is always tricky to get right).

Oftentimes in a Random battle in World of Tanks, your aim is just to shoot a tank, and try to do as much damage as possible and stay alive.

In Advances, the goal is to take the enemy gun out of a game — a tank that is a one-shot can still be a threat by staying alive and doing damage. So you need to look at the bigger picture and take out targets that are being called out, or present a bigger threat to the team in the long run, while also trying to keep your teammates alive. This can be done by blocking an enemy tank, forcing it to potentially overcommit, as well as keeping a teammate alive so they can get one more shot of damage out.

Overall, not a shabby start — there were outright victories, some closely-fought ones, and tough losses (4-10 defeats are always the most painful, since you no longer get Fame Points with the most recent change).

Day 1 Ranking: #392
Personal Fame Points: 110

The Second Night

The positives — we made our first moves on the Advanced front to try and make sure that all our players that were available were able to try and grab some Fame Points. Luckily, we were able to do quite well there, taking a few victories and earning a good amount of Fame Points to push us forward quite effectively early on!

Unfortunately, disaster struck later that evening. With us being short by just one player, we were unable to fill a battle — meaning we had to take our first technical defeat, and take our first penalty. Further technical defeats would decrease our ability to apply for landing auctions (the chipping process) by 50%, so we needed to avoid the second technical penalty by any means necessary. This meant a much more conservative approach for the rest of the night, making sure that we didn't overchip and that we only got games that we could 100% fill.

We continued to improve in our teamplay and teamwork, and achieved some solid victories, while learning further optimisations and enhancements for individual play as well, such as when to share HP effectively and when to block for teammates!

I called it an early night and didn't play any further during the later timezones — let's see if it comes back and bites me in the future!

Day 2 Ranking: #425
Personal Fame Points: 352

The Third Night

We were starting to build momentum up — in a long campaign format, it's not about peaking early, but about sustaining effort, learning, and eventually being able to overcome even the strongest opponents.

As we were chipping carefully to avoid future technical penalties, we sometimes went in with five or six players to spare — this is crucial in a campaign, having lots of people who are willing to help out with their time and patience if their presence is ever needed. This was certainly appreciated by our clan, as we were able to fill every game with full numbers, and make a concentrated push forward after a good start.

Synergy was starting to build with the players, as we were spending multiple hours each night playing with each other, and the best part was being able to learn a lot from the experience that was present on our team. Everyone was giving constructive feedback, so that we could start tightening up the gameplay and make sure we take some cleaner victories, or better fights.

KaRath's Recommendation #2: Try not flipping your tank — it generally leads to a tank out of the battle, and your teammates laughing at you.

Day 3 Ranking: #398
Personal Fame Points: 628

The Fourth Night

Our best night to date as we were starting to take more battles on the Advanced front — we were making deep runs in tournaments for landing auctions, and making sure that we utilised the strength of our vehicles to their full potential.

The more we played the same maps, we began to understand what fights to take, which positions were important, and how to make sure we didn't lose HP unnecessarily. This brings us to the concept of bleeding and taking strong positioning, which I will go into briefly below!

Day 4 Ranking: #280
Personal Fame Points: 1064

About Bleed

Expand

Oftentimes on maps, there's three ways of calling, or general strategies that you can use.

  • The first one is something utilised quite often to success in Global Map due to the presence of Fog of War — a rush off the spawn, with a spearhead attack into a key position with fast and mobile tanks to try and overwhelm an enemy.
  • The second one is commonly seen in maps where it may be a defending team holding onto a province, with a camp — tanks designed to have lots of HP, and limited mobility to just hold key sectors and corridors of the map.
  • Finally, the last one is a spread across the map, in a way that tanks can rotate accordingly into battle, and gain information to then slowly take map control.

All three of these concepts rely on the fundamental concept of "bleed" — taking HP off the enemy vehicles before making a decisive push to end the battle.

  • For a rush, this is designed in a way where all of your tanks must be in the fight before they can lose HP — you will lose HP in your initial rush, but as you have the numbers to overwhelm your enemies,  your effective DPM is increased by having more guns in the fight, thus outmatching your opponent's brawling potential.
  • For a camp, tanks holding key corridors take shots at enemy vehicles heading in — when it does eventuate in a brawl, you have the HP advantage, leading to an easier clean-up and victory as you have the advantage in the number of tanks "effectively" alive.
  • For a default spread, the key is to inflict damage onto tanks that are taking positions before you receive a push, or as you are planning to make a push yourself into enemy territory.

There's no "rock-paper-scissors" strategy here: every scenario is different, every battle can change depending on the shots made, information gathered, or tanks in specific positions. A tank may "bleed" HP to get into a strong position; however, once it is there it is almost impossible to kill without sacrificing your own tanks to dig it out. Similarly, tanks that are in a bad position and bleed HP unnecessarily can lead to a defeat.

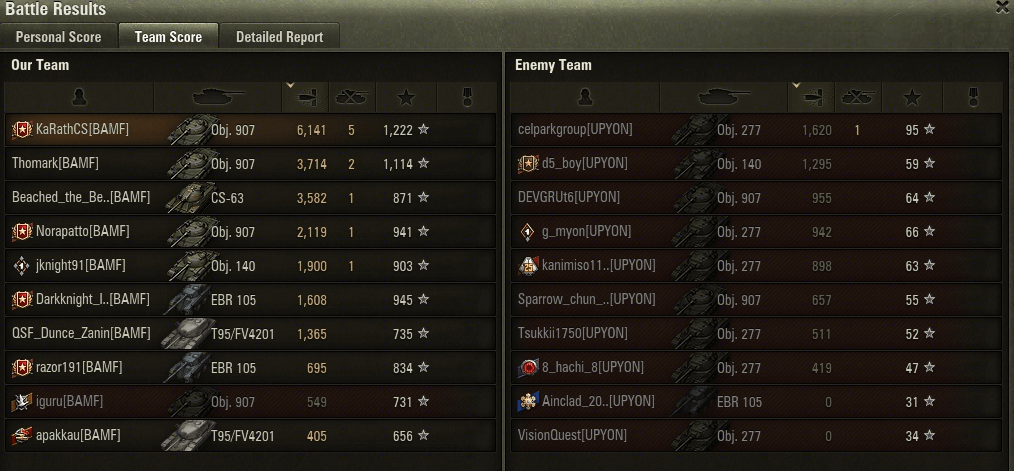
An example of this is a game we had on Malinovka — we rushed our fast mediums in our 907s and 140s into a key part of the enemy corner of the map after spotting their lineup heading up to the hill, and took a key position in the back corner of the map.

This key position allowed me to farm the enemy tanks as they then had to return from the hill push, leading to a massive ammo rack on the enemy Object 140, and a big farm game as well!

Although this seems very risky given the fact that you can be "bled" on the push across the open terrain, having vision control and taking a key position here was vitally important, leading to a big victory, and personally my strongest individual damage game in the Global Map so far.

Collapse

The Fifth Night

Although we talk about doing a huge amount of damage in the previous section, I have to stress that the Global Map is not about the individual who is doing the most damage to enemy tanks. It is ultimately a team game — you need to support your teammates and make the correct decisions in a stressful situation, where a single mistake could lead to defeat.

This almost occurred in a critical match on Cliff, as I took the top of the hill in my CS-63. Going back to the concept of "bleed" — even though I lost HP committing to the climb, winning the fight and having a position where you can fire down and force poor trades from your opponent is so important that it can win you games.

Mis-playing, however, can also lose your team a game, as I found out when I pushed my CS-63 to the wrong side, died, and lost control of the hill, almost costing our team the match.

Although I had the highest individual damage... it doesn't matter if you make the mistake that loses your team the game.

Luckily that was not the case here, but don't forget that every game is a learning experience, and should be used to further hone your skills so you don't make the same mistakes again the next time!

Another solid night, even though I only commited to half the night here — making some serious ground!

Day 5 Ranking: #275
Personal Fame Points: 1396

The Sixth Night

The challengers started appearing! As we were having a huge amount of success, we had started to climb into some serious ELO territory, which meant we would be playing against the big clans now — the top echelon of the APAC server.

And let me tell you this — it's tough.

Going up against these clans with their depth of experience and individual ability — it can almost feel like you're drowning at times.

Oftentimes these games have an opening stage where you feel as if it is relatively close, before you just bleed so much HP and they take a massive 15-3 victory.

But you can't get too down on these defeats — after all, if you want to prove you're the best, you have to play against the best, and learn from your losses.

A rough start to the night ultimately turned into a night of success, however, as we were able to fight quite successfully in provinces in later timezones after overcoming said opposition.

Day 6 Ranking: #225
Personal Fame Points: 1703

The Seventh Night

Halfway through the campaign — how time flies when you're having fun!

A similar start to the previous night, where defeats in some earlier timezones meant we were under serious pressure to perform later on. And fortunately, we did!

Pulling off some sick shots on Prokhorovka in my Object 907, we took the battles in the late timezones to the end, accumulating points and keeping our morale high.

Day 7 Ranking: #174
Personal Fame Points: 2094

So clearly you're in a good position... can I take you out on a Valentine's Day date, KaRath?

Tanks waits for no person at this point — and although I am flattered by your offer, I will, unfortunately, have to reject it and focus on the Global Map again tonight.

The push for the  X T95/FV4201 Chieftain  is looking pretty solid right now, and hopefully we'll be able to talk a little bit about brawling within the next diary entry!

We'll be back pretty soon, so see you next time, folks!

Close