Dynamic Battle Scenarios
The three Frontline battle scenarios have different rules regarding Combat Reserves.
- Standard Battle (34% chance): Combat Reserves are used as per the regular Frontline rules.
- Operational Support (33% chance): In this scenario, first introduced in 2022, Combat Reserves' cooldown time is decreased by 50% (after the start of battle, respawning, or unlocking a new Reserve). More frequent use of Combat Reserves enhances battle dynamics and broadens the range of tactical possibilities.
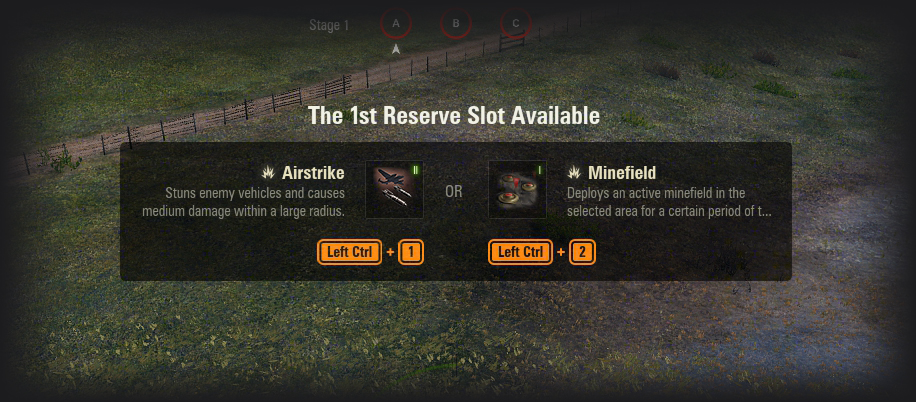
- Twist of Fate (33% chance): Upon reaching certain Ranks in this scenario, which debuted in 2023, you choose between two randomly selected Combat Reserves. This means you can sometimes even use combos of the same Reserves. Combat Reserves placed in slots in the Garage before battle have a better chance of being offered for selection, and the Level of Reserves purchased with Combat Reserve Points will increase by 1 in battle (meaning they will have 4 Levels).
The dynamic battle scenario rules can be accessed on the Frontline screen in the Garage and on the Combat Reserves screen.
.jpg)
- Normandie
- Kraftwerk
- Fata Morgana


The map has five pillboxes. As soon as attackers capture at least one sector within the 2nd defensive front, they can embark on their primary mission: Destroy the pillboxes, long-range guns each with their own HP pool. Pillboxes are protected by armored hoods and are virtually impenetrable when faced head-on. Aim at their rear, where there is significantly thinner armor. The attacking team wins as soon as they destroy three pillboxes.
 Active
 Destroyed
 Active
 Destroyed

There are special spots scattered across the active combat area where you can restore HP, repair modules, and replenish ammo and consumables.
Resupply Circles have a cooldown time. Once you have repaired your vehicle to 100%, you must wait 120 seconds before you can use it again. If you are hit while in a Resupply Circle, you must wait an additional 5 minutes to stock up on rounds and finish repairing the vehicle.


An area of the map where the attacking team can gain control over a particular front. Standard base capture mechanics apply: Once the attacking vehicles enter the circle, the front begins being captured. When the attackers capture a base, they take control of the entire zone, and the next zone (vertically) becomes available for capture.
 Captured zone
 Uncaptured zone

An area of the map where the attacking team can gain control over a particular front. Standard base capture mechanics apply: Once the attacking vehicles enter the circle, the front begins being captured. When the attackers capture a base, they take control of the entire zone, and the next zone (vertically) becomes available for capture.
Captured zone Uncaptured zone
The map has five pillboxes. As soon as attackers capture at least one sector within the 2nd defensive front, they can embark on their primary mission: Destroy the pillboxes, long-range guns each with their own HP pool. Pillboxes are protected by armored hoods and are virtually impenetrable when faced head-on. Aim at their rear, where there is significantly thinner armor. The attacking team wins as soon as they destroy three pillboxes.
Active Destroyed Active Destroyed
The map has five pillboxes. As soon as attackers capture at least one sector within the 2nd defensive front, they can embark on their primary mission: Destroy the pillboxes, long-range guns each with their own HP pool. Pillboxes are protected by armored hoods and are virtually impenetrable when faced head-on. Aim at their rear, where there is significantly thinner armor. The attacking team wins as soon as they destroy three pillboxes.
Active Destroyed Active Destroyed There are special spots scattered across the active combat area where you can restore HP, repair modules, and replenish ammo and consumables.
Resupply Circles have a cooldown time. Once you have repaired your vehicle to 100%, you must wait 120 seconds before you can use it again. If you are hit while in a Resupply Circle, you must wait an additional 5 minutes to stock up on rounds and finish repairing the vehicle.
There are special spots scattered across the active combat area where you can restore HP, repair modules, and replenish ammo and consumables.
Resupply Circles have a cooldown time. Once you have repaired your vehicle to 100%, you must wait 120 seconds before you can use it again. If you are hit while in a Resupply Circle, you must wait an additional 5 minutes to stock up on rounds and finish repairing the vehicle.


An area of the map where the attacking team can gain control over a particular front. Standard base capture mechanics apply: Once the attacking vehicles enter the circle, the front begins being captured. When the attackers capture a base, they take control of the entire zone, and the next zone (vertically) becomes available for capture.
Captured zone Uncaptured zone There are special spots scattered across the active combat area where you can restore HP, repair modules, and replenish ammo and consumables.
Resupply Circles have a cooldown time. Once you have repaired your vehicle to 100%, you must wait 120 seconds before you can use it again. If you are hit while in a Resupply Circle, you must wait an additional 5 minutes to stock up on rounds and finish repairing the vehicle.
There are special spots scattered across the active combat area where you can restore HP, repair modules, and replenish ammo and consumables.
Resupply Circles have a cooldown time. Once you have repaired your vehicle to 100%, you must wait 120 seconds before you can use it again. If you are hit while in a Resupply Circle, you must wait an additional 5 minutes to stock up on rounds and finish repairing the vehicle.


An area of the map where the attacking team can gain control over a particular front. Standard base capture mechanics apply: Once the attacking vehicles enter the circle, the front begins being captured. When the attackers capture a base, they take control of the entire zone, and the next zone (vertically) becomes available for capture.
Captured zone Uncaptured zone There are special spots scattered across the active combat area where you can restore HP, repair modules, and replenish ammo and consumables.
Resupply Circles have a cooldown time. Once you have repaired your vehicle to 100%, you must wait 120 seconds before you can use it again. If you are hit while in a Resupply Circle, you must wait an additional 5 minutes to stock up on rounds and finish repairing the vehicle.


An area of the map where the attacking team can gain control over a particular front. Standard base capture mechanics apply: Once the attacking vehicles enter the circle, the front begins being captured. When the attackers capture a base, they take control of the entire zone, and the next zone (vertically) becomes available for capture.
Captured zone Uncaptured zone

An area of the map where the attacking team can gain control over a particular front. Standard base capture mechanics apply: Once the attacking vehicles enter the circle, the front begins being captured. When the attackers capture a base, they take control of the entire zone, and the next zone (vertically) becomes available for capture.
Captured zone Uncaptured zone 
The map has five pillboxes. As soon as attackers capture at least one sector within the 2nd defensive front, they can embark on their primary mission: Destroy the pillboxes, long-range guns each with their own HP pool. Pillboxes are protected by armored hoods and are virtually impenetrable when faced head-on. Aim at their rear, where there is significantly thinner armor. The attacking team wins as soon as they destroy three pillboxes.
Active Destroyed Active Destroyed 
An area of the map where the attacking team can gain control over a particular front. Standard base capture mechanics apply: Once the attacking vehicles enter the circle, the front begins being captured. When the attackers capture a base, they take control of the entire zone, and the next zone (vertically) becomes available for capture.
Captured zone Uncaptured zone 
There are special spots scattered across the active combat area where you can restore HP, repair modules, and replenish ammo and consumables.
Resupply Circles have a cooldown time. Once you have repaired your vehicle to 100%, you must wait 120 seconds before you can use it again. If you are hit while in a Resupply Circle, you must wait an additional 5 minutes to stock up on rounds and finish repairing the vehicle.
An area of the map where the attacking team can gain control over a particular front. Standard base capture mechanics apply: Once the attacking vehicles enter the circle, the front begins being captured. When the attackers capture a base, they take control of the entire zone, and the next zone (vertically) becomes available for capture.
Captured zone Uncaptured zone There are special spots scattered across the active combat area where you can restore HP, repair modules, and replenish ammo and consumables.
Resupply Circles have a cooldown time. Once you have repaired your vehicle to 100%, you must wait 120 seconds before you can use it again. If you are hit while in a Resupply Circle, you must wait an additional 5 minutes to stock up on rounds and finish repairing the vehicle.
There are special spots scattered across the active combat area where you can restore HP, repair modules, and replenish ammo and consumables.
Resupply Circles have a cooldown time. Once you have repaired your vehicle to 100%, you must wait 120 seconds before you can use it again. If you are hit while in a Resupply Circle, you must wait an additional 5 minutes to stock up on rounds and finish repairing the vehicle.
The map has five pillboxes. As soon as attackers capture at least one sector within the 2nd defensive front, they can embark on their primary mission: Destroy the pillboxes, long-range guns each with their own HP pool. Pillboxes are protected by armored hoods and are virtually impenetrable when faced head-on. Aim at their rear, where there is significantly thinner armor. The attacking team wins as soon as they destroy three pillboxes.
Active Destroyed Active Destroyed The map has five pillboxes. As soon as attackers capture at least one sector within the 2nd defensive front, they can embark on their primary mission: Destroy the pillboxes, long-range guns each with their own HP pool. Pillboxes are protected by armored hoods and are virtually impenetrable when faced head-on. Aim at their rear, where there is significantly thinner armor. The attacking team wins as soon as they destroy three pillboxes.
Active Destroyed Active Destroyed The map has five pillboxes. As soon as attackers capture at least one sector within the 2nd defensive front, they can embark on their primary mission: Destroy the pillboxes, long-range guns each with their own HP pool. Pillboxes are protected by armored hoods and are virtually impenetrable when faced head-on. Aim at their rear, where there is significantly thinner armor. The attacking team wins as soon as they destroy three pillboxes.
Active Destroyed Active Destroyed The map has five pillboxes. As soon as attackers capture at least one sector within the 2nd defensive front, they can embark on their primary mission: Destroy the pillboxes, long-range guns each with their own HP pool. Pillboxes are protected by armored hoods and are virtually impenetrable when faced head-on. Aim at their rear, where there is significantly thinner armor. The attacking team wins as soon as they destroy three pillboxes.
Active Destroyed Active Destroyed There are special spots scattered across the active combat area where you can restore HP, repair modules, and replenish ammo and consumables.
Resupply Circles have a cooldown time. Once you have repaired your vehicle to 100%, you must wait 120 seconds before you can use it again. If you are hit while in a Resupply Circle, you must wait an additional 5 minutes to stock up on rounds and finish repairing the vehicle.
There are special spots scattered across the active combat area where you can restore HP, repair modules, and replenish ammo and consumables.
Resupply Circles have a cooldown time. Once you have repaired your vehicle to 100%, you must wait 120 seconds before you can use it again. If you are hit while in a Resupply Circle, you must wait an additional 5 minutes to stock up on rounds and finish repairing the vehicle.
There are special spots scattered across the active combat area where you can restore HP, repair modules, and replenish ammo and consumables.
Resupply Circles have a cooldown time. Once you have repaired your vehicle to 100%, you must wait 120 seconds before you can use it again. If you are hit while in a Resupply Circle, you must wait an additional 5 minutes to stock up on rounds and finish repairing the vehicle.
An area of the map where the attacking team can gain control over a particular front. Standard base capture mechanics apply: Once the attacking vehicles enter the circle, the front begins being captured. When the attackers capture a base, they take control of the entire zone, and the next zone (vertically) becomes available for capture.
Captured zone Uncaptured zone An area of the map where the attacking team can gain control over a particular front. Standard base capture mechanics apply: Once the attacking vehicles enter the circle, the front begins being captured. When the attackers capture a base, they take control of the entire zone, and the next zone (vertically) becomes available for capture.
Captured zone Uncaptured zone There are special spots scattered across the active combat area where you can restore HP, repair modules, and replenish ammo and consumables.
Resupply Circles have a cooldown time. Once you have repaired your vehicle to 100%, you must wait 120 seconds before you can use it again. If you are hit while in a Resupply Circle, you must wait an additional 5 minutes to stock up on rounds and finish repairing the vehicle.
There are special spots scattered across the active combat area where you can restore HP, repair modules, and replenish ammo and consumables.
Resupply Circles have a cooldown time. Once you have repaired your vehicle to 100%, you must wait 120 seconds before you can use it again. If you are hit while in a Resupply Circle, you must wait an additional 5 minutes to stock up on rounds and finish repairing the vehicle.

The map has five pillboxes. As soon as attackers capture at least one sector within the 2nd defensive front, they can embark on their primary mission: Destroy the pillboxes, long-range guns each with their own HP pool. Pillboxes are protected by armored hoods and are virtually impenetrable when faced head-on. Aim at their rear, where there is significantly thinner armor. The attacking team wins as soon as they destroy three pillboxes.
Active Destroyed Active Destroyed 
There are special spots scattered across the active combat area where you can restore HP, repair modules, and replenish ammo and consumables.
Resupply Circles have a cooldown time. Once you have repaired your vehicle to 100%, you must wait 120 seconds before you can use it again. If you are hit while in a Resupply Circle, you must wait an additional 5 minutes to stock up on rounds and finish repairing the vehicle.

An area of the map where the attacking team can gain control over a particular front. Standard base capture mechanics apply: Once the attacking vehicles enter the circle, the front begins being captured. When the attackers capture a base, they take control of the entire zone, and the next zone (vertically) becomes available for capture.
Captured zone Uncaptured zone An area of the map where the attacking team can gain control over a particular front. Standard base capture mechanics apply: Once the attacking vehicles enter the circle, the front begins being captured. When the attackers capture a base, they take control of the entire zone, and the next zone (vertically) becomes available for capture.
Captured zone Uncaptured zone The map has five pillboxes. As soon as attackers capture at least one sector within the 2nd defensive front, they can embark on their primary mission: Destroy the pillboxes, long-range guns each with their own HP pool. Pillboxes are protected by armored hoods and are virtually impenetrable when faced head-on. Aim at their rear, where there is significantly thinner armor. The attacking team wins as soon as they destroy three pillboxes.
Active Destroyed Active Destroyed The map has five pillboxes. As soon as attackers capture at least one sector within the 2nd defensive front, they can embark on their primary mission: Destroy the pillboxes, long-range guns each with their own HP pool. Pillboxes are protected by armored hoods and are virtually impenetrable when faced head-on. Aim at their rear, where there is significantly thinner armor. The attacking team wins as soon as they destroy three pillboxes.
Active Destroyed Active Destroyed The map has five pillboxes. As soon as attackers capture at least one sector within the 2nd defensive front, they can embark on their primary mission: Destroy the pillboxes, long-range guns each with their own HP pool. Pillboxes are protected by armored hoods and are virtually impenetrable when faced head-on. Aim at their rear, where there is significantly thinner armor. The attacking team wins as soon as they destroy three pillboxes.
Active Destroyed Active Destroyed The map has five pillboxes. As soon as attackers capture at least one sector within the 2nd defensive front, they can embark on their primary mission: Destroy the pillboxes, long-range guns each with their own HP pool. Pillboxes are protected by armored hoods and are virtually impenetrable when faced head-on. Aim at their rear, where there is significantly thinner armor. The attacking team wins as soon as they destroy three pillboxes.
Active Destroyed Active Destroyed There are special spots scattered across the active combat area where you can restore HP, repair modules, and replenish ammo and consumables.
Resupply Circles have a cooldown time. Once you have repaired your vehicle to 100%, you must wait 120 seconds before you can use it again. If you are hit while in a Resupply Circle, you must wait an additional 5 minutes to stock up on rounds and finish repairing the vehicle.
There are special spots scattered across the active combat area where you can restore HP, repair modules, and replenish ammo and consumables.
Resupply Circles have a cooldown time. Once you have repaired your vehicle to 100%, you must wait 120 seconds before you can use it again. If you are hit while in a Resupply Circle, you must wait an additional 5 minutes to stock up on rounds and finish repairing the vehicle.
There are special spots scattered across the active combat area where you can restore HP, repair modules, and replenish ammo and consumables.
Resupply Circles have a cooldown time. Once you have repaired your vehicle to 100%, you must wait 120 seconds before you can use it again. If you are hit while in a Resupply Circle, you must wait an additional 5 minutes to stock up on rounds and finish repairing the vehicle.
An area of the map where the attacking team can gain control over a particular front. Standard base capture mechanics apply: Once the attacking vehicles enter the circle, the front begins being captured. When the attackers capture a base, they take control of the entire zone, and the next zone (vertically) becomes available for capture.
Captured zone Uncaptured zone There are special spots scattered across the active combat area where you can restore HP, repair modules, and replenish ammo and consumables.
Resupply Circles have a cooldown time. Once you have repaired your vehicle to 100%, you must wait 120 seconds before you can use it again. If you are hit while in a Resupply Circle, you must wait an additional 5 minutes to stock up on rounds and finish repairing the vehicle.
There are special spots scattered across the active combat area where you can restore HP, repair modules, and replenish ammo and consumables.
Resupply Circles have a cooldown time. Once you have repaired your vehicle to 100%, you must wait 120 seconds before you can use it again. If you are hit while in a Resupply Circle, you must wait an additional 5 minutes to stock up on rounds and finish repairing the vehicle.
There are special spots scattered across the active combat area where you can restore HP, repair modules, and replenish ammo and consumables.
Resupply Circles have a cooldown time. Once you have repaired your vehicle to 100%, you must wait 120 seconds before you can use it again. If you are hit while in a Resupply Circle, you must wait an additional 5 minutes to stock up on rounds and finish repairing the vehicle.
An area of the map where the attacking team can gain control over a particular front. Standard base capture mechanics apply: Once the attacking vehicles enter the circle, the front begins being captured. When the attackers capture a base, they take control of the entire zone, and the next zone (vertically) becomes available for capture.
Captured zone Uncaptured zone There are special spots scattered across the active combat area where you can restore HP, repair modules, and replenish ammo and consumables.
Resupply Circles have a cooldown time. Once you have repaired your vehicle to 100%, you must wait 120 seconds before you can use it again. If you are hit while in a Resupply Circle, you must wait an additional 5 minutes to stock up on rounds and finish repairing the vehicle.
An area of the map where the attacking team can gain control over a particular front. Standard base capture mechanics apply: Once the attacking vehicles enter the circle, the front begins being captured. When the attackers capture a base, they take control of the entire zone, and the next zone (vertically) becomes available for capture.
Captured zone Uncaptured zone An area of the map where the attacking team can gain control over a particular front. Standard base capture mechanics apply: Once the attacking vehicles enter the circle, the front begins being captured. When the attackers capture a base, they take control of the entire zone, and the next zone (vertically) becomes available for capture.
Captured zone Uncaptured zone
Tier 2–4
Tier 5
Tier 6–9
Tier 10
Tier 11–14
Tier 15
Tier 16–19
Tier 20