The Chieftain's Hatch: Tobruk


Today is ANZAC Day. Well, by the time this article comes up on North America it was yesterday for the people who most care about it: The lads down in Australia and New Zealand. For those of you who are unfamiliar with the concept, it’s kindof like Memorial Day and Veterans’ Day rolled into one, and, unlike the rather superficial lip-service we often seem to pay to commemorating such dates in the US, they take it seriously. From my brief visit to Australia a couple of years ago, I was struck as to the amount of visibility given to veterans memorials; even the main drag in the capital city being ANZAC Parade, and in a direct line so that when the Prime Minister opens his door and the doors at of the Cabinet Room and Parliament, he sees up ANZAC Parade and at the far end of it, the Australian War Memorial, as a reminder of the gravity of his responsibility.
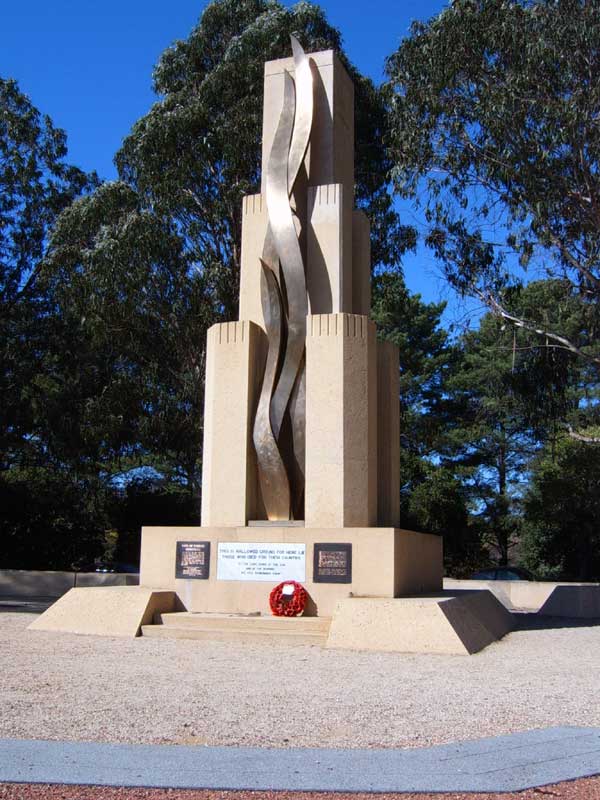
ANZAC is most commonly associated with WWI and the Gallipoli Operation. Indeed, the first ANZAC Day was observed on 25th April 1916, the year after the landings on Gallipoli. (And, it should be noticed, that there is a large memorial to the enemy commander on ANZAC Parade as well, which is a nice touch) However, it is not the only significant battle in Australian history, and, indeed, of the various monuments on ANZAC Parade, there is only one which is to commemorate one specific battle. That battle was Tobruk.
So, since we know that a historical battle mode for Tobruk is planned for future release in the game, now is as good a time as any to take a look at it. Since it pre-dates the US’s entry into the war, and frankly, North Africa doesn’t have much cachet compared to some of the other campaigns, the Siege of Tobruk is definitely under-recognised over here. It is sometimes described as the battle which saved the Empire, and though that may be a slight overstatement, its importance in the overall North Africa campaign cannot be understated. At 244 days, it was the longest siege in the history of the Empire, and one of the few sieges in WWII which the defenders won. Although fought under Australian command, it would be a mistake to say that it was an Australian battle, however: They would not have been successful without the aid of the British and Indian units also trapped in the perimeter.
First, a geography lesson. If you’re not sure what the strategic importance of Tobruk was, go pull out a globe. There’s not much between Benghazi and Alexandria. At the time, there was one actual road, the Via Balbia, built by the Italians, to cover much of the distance. Tobruk is the only significant port, and has a good natural harbor. To put things as a matter of scale, the distance from Tobruk to Alexandria is the greater than from Normandy to Germany. And with only one road to do it, not only does Tobruk provided a port of debarkation for supplies and equipment to halve the travel distance on that road, it also cuts the road in two: To use the whole road, one needs Tobruk. Plus there was a matter of capacity: Benghazi and Tripoli together could not service the tonnage of supplies required by the Axis forces in North Africa.
In the larger scheme of things, the Italians had quite the little empire of their own going, between Libya (1/8 of the population of Libya was Italian) in North Africa, and Italian East Africa on the Eastern coast of the continent. This neatly surrounded the British in Egypt, whose focus was the preservation of the Suez Canal and its ability to knock about 40 days off travel time to the reaches of the British Empire. I’m not sure how much utility there was in the route when trying to get past Italy and Vichy France once things got hot, but certainly from the Axis perspective, getting control of the Suez region would not only remove a nuisance, but also open another option to go for the Middle East oilfields.
Australian involvement with Tobruk revolves around the 2nd Australian Imperial Force (The 1st was for WWI), and pretty much all Australian units in it had a unit designator beginning in “2/”. The first division to make it to Africa was the 6th Division, which was the unit which captured Tobruk on 22 January 1941.
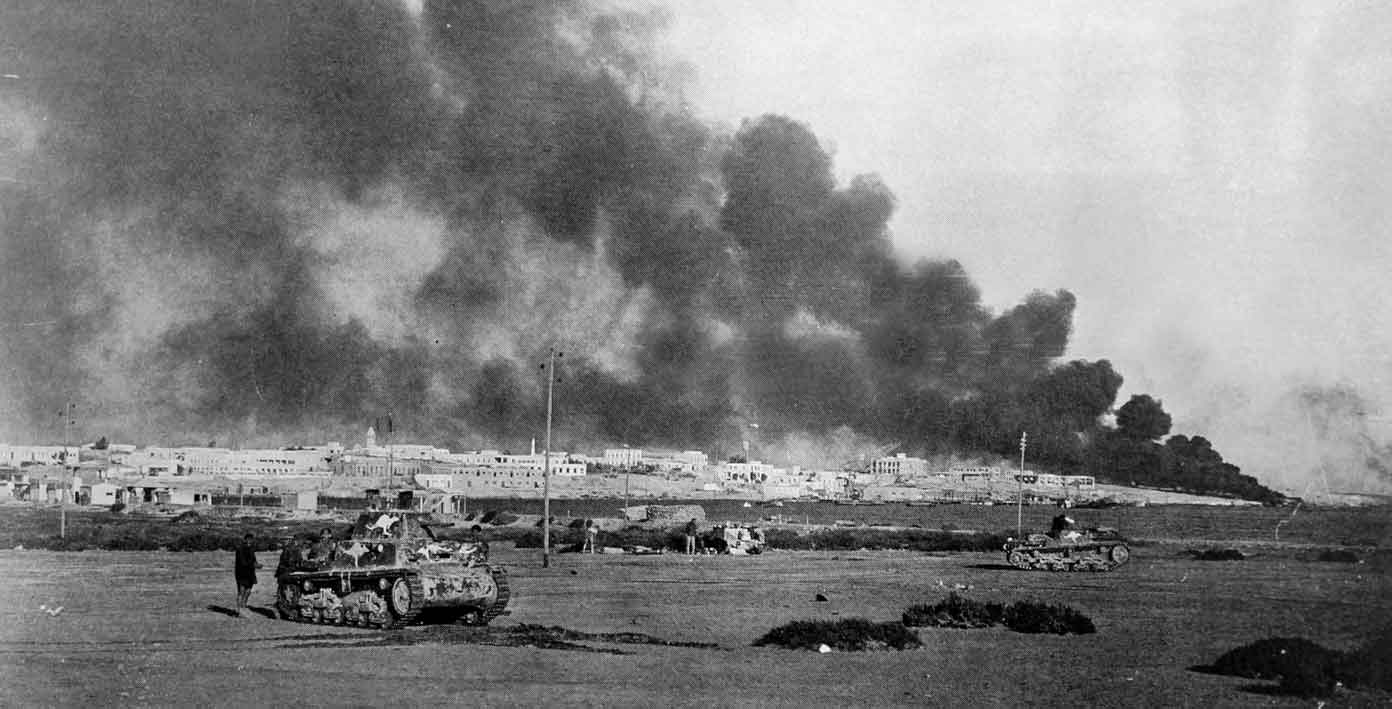
Australian tanks the day after Tobruk was captured. This operation was the first use of tanks by Australia in WWII.
The capture of Tobruk, at the cost to 6th Division of 49 dead and 306 wounded, resulted in the capture of a strategically important town, 87 tanks (of dubious quality), 200 artillery pieces, and some 25,000 prisoners. The Italians would prove to be an interesting enemy. Figures like these reinforce the perception that the Italians neither were particularly good at fighting, nor were they particularly well motivated to do so. But they often substituted courage for tactics, and just as often, surrendered after putting up a brisk, but short resistance. We’ll probably talk about the Italians at a future article, but we’ll just say that the figures don’t entirely bring about the whole story. Over the course of the conflict Italian forces were well capable of surprising both Germans and Allied forces when they underestimated them. Italian artillery units in particular were both competent and courageous, and they would prove to be of great annoyance to the Commonwealth forces, but for now, they had provided the new occupants of Tobruk with a substantial number of anti-tank and anti-aircraft artillery pieces. They would need them: Almost half the Australian 113 AT guns at the beginning of the siege were Italian.
In the meantime, the battlefield continued on to Benghazi. About there, the British decided to call a halt. They had basically no serviceable tanks any more, and it was estimated that the Italians remaining were not sufficient a threat to the theatre. In the meantime, the Italians in East Africa needed dealing with and a force needed to be sent off to Greece, so the British forces in North Africa were pretty much required to hold position by default. They weren’t too worried, though. Although they were aware that the Germans were starting to put some forces into North Africa to prevent the total eviction of their Italian colleagues, Ultra intercepts of the German instructions to their new commander, Rommel, made it clear that his instructions were to hold his ground.
Unfortunately for all concerned, Rommel promptly set about ignoring his instructions and went on the offensive. With only one proper armoured division, the 5th Light, he still had more powerful armoured forces than the British had in theatre, both numerically and qualitatively, and he also wasn’t averse to using the Italian armour as well. This resulted in the Benghazi-Tobruk Handicap, as the withdrawl was called, with the British basically being forced to withdraw all the way back to where they started, simply due to a lack of anything to stop the enemy with before then.
After some discussion, it was finally decided to try to hold Tobruk as a direct hindrance to Axis ambitions to move further East. Without Tobruk, the supply line, and port capacity, the Axis could not easily move further East. It was accepted that it would be a siege. Responsibility for the defence would rest with the under-strength Australian 9th Division, under its commander, General Leslie Morshead.
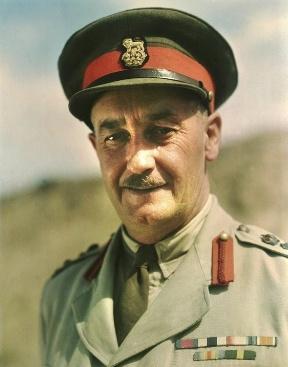
Morshead began his military career in 1914, when he enlisted as a private soldier in a rifle battalion. Very quickly thereafter commissioned, he learned his trade first in Gallipoli, and later in the trenches of the Western Front. This latter proved particularly fortuitous as it gave him some experience in the issues of positional warfare. Generally ‘proper’ (possibly a holdover from his schoolmaster days), he became known as “Ming the Merciless” due to his discipline streak. There is perhaps a little dichotomy there, as Australian soldiers have never been known for what we in the US would call “appropriate military bearing,” but then, what the Aussies call ‘appropriate’ and what we do may not be entirely the same.
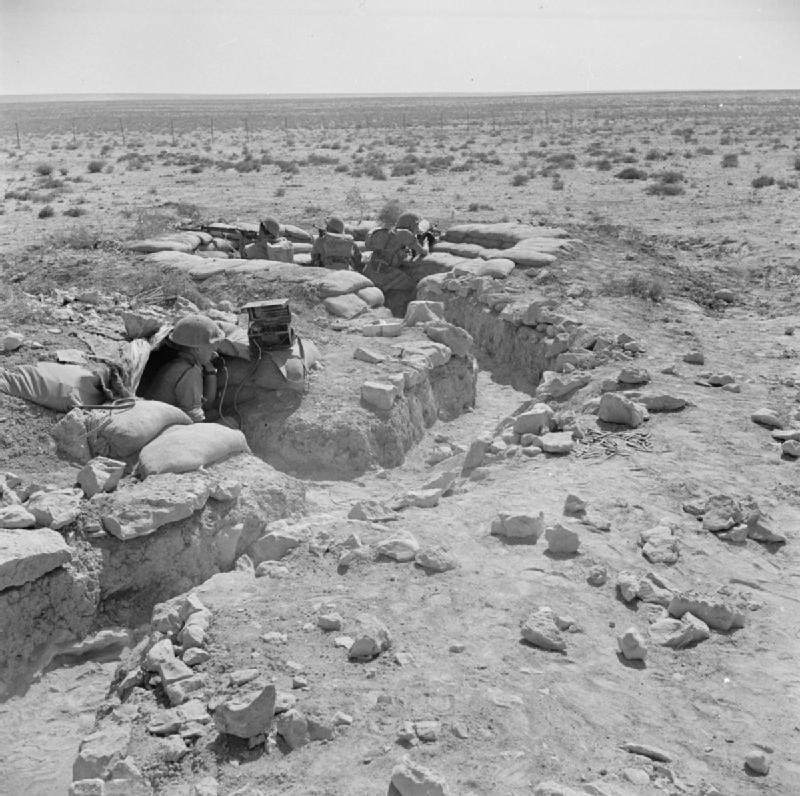
With a little bit more warning time for the arrival of the enemy on Tobruk than the Italians had, he set about creating a perimeter some 30km from the town itself, in order to keep the town out of artillery range. Although perhaps a little long, it had two advantages. Firstly, it was the line that the Italians had chosen, so there were already forts and other obstacles in place, and secondly, it was about the only defensible terrain in the area. Which was probably why the Italians had picked it to begin with. This was known as “The Red Line”, with a second defensive line behind it, “The Blue Line”. The perimeter was mainly to be a series of forts, with some defense in depth, mutual support, and a long line of anti-tank ditch (When it wasn’t being filled in by sandstorms), wire, and as many mines as could be laid in the time available providing the main obstacle belt around the perimeter. A race also began to send as many reinforcements to Tobruk as possible before the Axis forces closed the gap, a few units actually managing to break through weak German lines to do it.
There were three main philosophies to the defense. Firstly, command of ‘no man’s land’. It is considered that this was a lesson learned by Morshead in the WWI trenches. His soldiers would not simply sit in place and respond to attacks, they would be quite aggressive in making the occasional foray to keep the enemy off-guard. And, in fairness, this quite probably suited the temperament of the Australian soldiers anyway. Secondly, the main defensive line itself. And thirdly, a couple of mobile units in reserve, not least a motley collection of vehicles called “The Tobruk Tanks”, which were about two dozen cruisers, a dozen light tanks, and four Matilda IIs. A dozen 2prs were also mounted portee on trucks. (Another 8 Matildas IIs arrived by sea on LCTs the first few days of the siege).
Mercilessly pushed on by Rommel, German forces encircled the town on 11th April 1941. They and the Italians thus faced off against about 15,000 Australians, 10,000 Britons, and a smattering of Indians. The men of the 9th Division were determined not to hand back the trophy which their compatriots in 6th Division had acquired.
Convinced that Tobruk was lightly defended, Rommel immediately ordered an attack with whatever was to hand. Truth be told, there wasn’t much. German tank engines had a service life of about 2,500km, and by the time they had made it from Tripoli to Tobruk, they has over 2,000 on the clock. The commander of 5th Light, General Streich, was not pleased, demanding some time to maintain the tanks and increase his strength, but was overruled. Tobruk must be taken before the British had time to prepare their defenses. Besides, they had just chased the British over a thousand kilometers without much fight, Tobruk wouldn’t be much different. Apparently nobody had told the Australians.
In the event, the first strike at Tobruk would come on the morning of the 11th from the tankless forces of General von Prittwitz, commander of 15th Panzer who had arrived in Libya with the vanguard of his unit, and travelled to the front lines to get a lay of the land. Rommel co-opted him to command a scratch brigade of infantry and anti-tank troops with instructions to prevent the British from doing another Dunkirk. Evidently expecting to just waltz in, he led his forces in a rather careless charge, and was killed by artillery fired by British and Australian gunners. (The Australians had a unit they named “the Bush Artillery”, which basically used captured guns crewed by non-artillery men often without any sights as they had been removed by the Italians prior to capture. Enthusiasm and adaptability kept them quite viable).
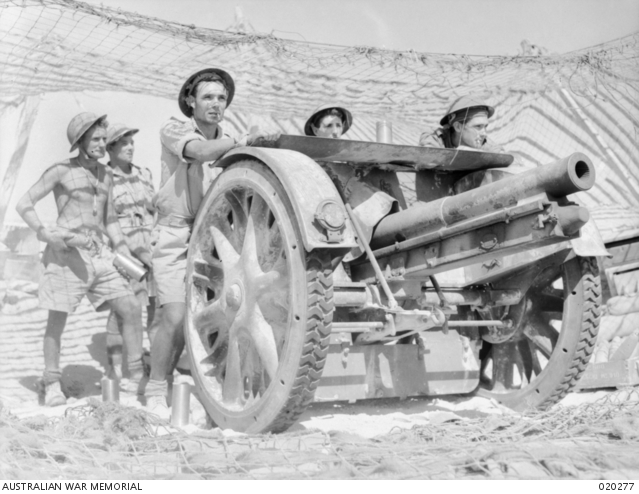
Infantrymen from 2/17 Battalion man their Italian 75mm.
Later that afternoon, further South on the perimeter, Panzer Regiment 5 was able to cobble together about 25 Panzers, and supported by about two score of M13/40s and CV-33s from Ariete, with a battalion of troops, took a crack against 20th Australian Brigade, being stymied first by the anti-tank ditch, and later by the cruisers of 1st RTR. The Germans took stock for about 24 hours, tried again the next day, with no more success. At that point, it became obvious that the waltz wasn’t going to happen, and more severe methods would be required.
This came the next evening, but was a little more thought-out. A point of penetration was identified, and artillery bombardments used to suppress nearby fortifications to prevent them from supporting the breach’s defenders, and under the cover of the artillery and darkness, infantry would move forward. The infantry attack was met with a brief sally of Australians to clear them out, with a Corporal Edmonson earning a posthumous Victoria Cross, the first Australian to do so in the war, and the only such award for the whole siege.
By daybreak, however, the German pioneers had forced a point, and this allowed Panzer Regiment 5’s 38 tanks to go through. The Australians, in quite the show of discipline, simply let them past, and instead engaged the follow-on infantry and artillery. Generally ignoring 2Pr anti-tank fire, the panzers proceeded inland, directly to the guns of 1st Royal Horse Artillery, whose 25prs engaged them in a direct-fire duel. While maneuvering in response to these guns, the Panzers opened themselves up to the 2/3rd Anti-Tank Regiment, and almost simultaneously from the other side, 3rd RHA’s portees. If that wasn’t enough, a dozen cruisers and four Matildas from 1st and 7th RTR also joined in shortly after that, Morshead had ordered them to the area the day before as reconnaissance had indicated a point of attack. It became too much for the Germans, and they eventually withdrew their surivors back through the breach, some 15 wrecked and disabled Panzers were left behind. A captured German later remarked “I cannot understand you Australians. In Poland, Belgium and France, once the tanks got through, the soldiers took it for granted that they were beaten. But you are like demons. The tanks break through and your infantry still keep fighting”
A similar attack by the Italians the next day met a similar fate, with tanks breaching the perimeter, but unsupported by infantry, they withdrew of their own accord. The 17th saw yet another attack, with Italian tanks making it almost a mile into the perimeter before the arrival of some of Tobruk Tanks’ cruisers ended the incursion.
This brought about a week’s pause in the fighting as the Axis licked their wounds, and the defenders continued to improve their positions. The 22nd-24th saw sallies by Australians, Italians and Germans, with generally mixed results, but leaning in the Australian favour simply by casualty / prisoner count. 23rd April also saw the end of Tobruk’s little air force. The 7 Hurricanes were overmatched by the 60 enemy aircraft sent that day. The few survivors were relocated to Egypt.
Rommel prepared his next attack for the 30th. This time, OKH (German Army High Command) sent General Paulus out to find out what the hell Rommel thought he was doing. He arrived just beforehand, decided to let Rommel run with it, and stayed to watch the fun.
The attack came on the 1st May with a diversionary attack in the East, and the main in the West, in two prongs. Again, Morshead had correctly anticipated, and moved the Tobruk Tanks into the correct position. However, this time the combined German and Italian attack captured perimeter forts and held them, CV-33s with flamethrowers also being used. Two counter-attacks by the Australians failed to dislodge them, although the Aussies gave better than they got, but the British Matildas got a nasty shock when they discovered that the Panzers could knock them out.
There things sat for two days, when the Australians tried a more deliberate effort to remove the salient. This again failed, not least due to bitter resistance from an Italian infantry unit supported by an M13 and a couple of CV-33s.
However, by this point, OKH had had enough. Paulus had delivered his report, and in return, OKH very clearly, explicitly, practically in words of one syllable and totally unambiguously told Rommel in no uncertain terms to knock it off, and stop squandering his resources by attacking the Tobruk defenses like that. And that, by the way, that was not a suggestion or request.
And so the Siege of Tobruk settled down to something of a routine. Air attacks from German and Italian air forces proved to be more a danger to the troops, oftentimes, than the ground forces, with troops cycled to the rear for rest finding themselves subject to air attack. At the front lines, the situation varied from casual truces, to constant threat of sniper fire. The Germans became great respecters of Australian marksmanship with the Lee Enfield. Fleas and rats proved more of a nuisance than the enemy, to both sides. Speaking of rats, German propaganda made the analogy of the defenders being caught like rats, about to be exterminated. The defenders decided to run with it, and take the name for themselves: The Rats of Tobruk.
Australian involvement in Tobruk was not confined to land. A significant presence was the Scrap Iron Flotilla, a squadron of Australian destroyers based in Alexandria. In combination with an assortment of other British vessels, to include monitors, gunboats and, on occasion, battleships, these ships operated sometimes in the gunfire support role, but more often as the Tobruk Ferry Service, bringing in supplies and reinforcements, and taking out wounded and prisoners. Not without casualties: HMAS Waterhen was the first Australian ship sunk during WWII. Hit by air attack, she was sunk without loss to her crew, but HMAS Parramatta was not so lucky. She was torpedoed and sunk by U-559 with the loss of 114 of her 138 crew (U-559 was later attacked by the British, boarded, and the Enigma codes broken as a result). A number of British ships, both military and civilian, were also sunk on the supply run, though at least HMS Ladybird had the good grace to be sunk in the harbor in only 10 feet of water, where her 3” gun could still be used to engage aircraft.
HMAS Waterhen taking on water.
About six weeks into the siege, the overall British commander, General Archibald Wavell, took a crack at breaking the Axis Eastern line with Operation Brevity. They would go West, and Tobruk prepared to break out to the East. However, Brevity was a failure. After some initial gains in the face of determined opposition (Seven Matilda IIs were knocked out by Italian 47mm guns at Halfaya Pass), and then a good German counter-attack, the mission was called off, and the siege continued.
A month later, the 15th of June, Wavell tried again, with Operation Battleaxe. The Axis learned their lesson the previous time, and had prepared their defenses more strongly. It also didn’t hurt that the British radioed their units in the clear “Get ready tonight, we’re attacking tomorrow morning”. After a rather painful lesson, the British called it off again, and this time, Wavell was replaced by Auchinlek. Tobruk continued to sweat it out, under the constant harrying of air bombardment and a large artillery piece named Bardia Bill by the Rats, probably a 210mm railgun.
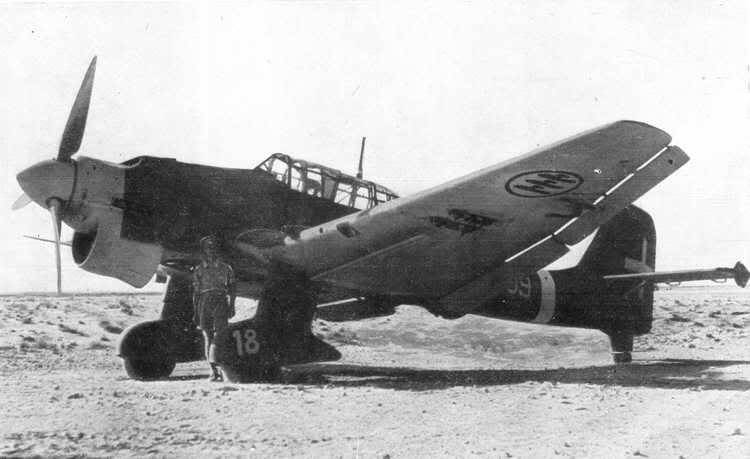
Both the Italian and the German air forces kept up the pressure
An unfortunate side effect of sweating is, of course, the need to wash. When in the desert, water is a little hard to come by sometimes, and as a result, in the order of priority, it was for drinking and keeping the equipment operating. Home-made stills, worthy of the finest moonshine facilities in the American South, started being made out of whatever was to hand, to desalinate sea water. It may not have been quite good enough for drinking, but at least one could shave in it.
Early August saw another attempt by two Australian battalions to remove the Axis salient in the perimeter, both were rebuffed within a day with the loss of 188 of 264 men, the Germans lost 60. That was the last time that the Australians tried to retake their former positions.
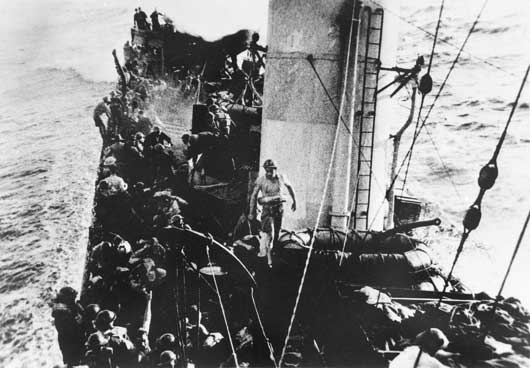
Political pressures began to intervene, however. The Australian Imperial Force had been created on the condition that it was to fight as a single entity. An entire division was instead separated and trapped in Tobruk, and there was a perception in Australia in particular that the Australians were left holding the bag, evidently the British and Indians in the perimeter weren’t getting much press. Pressure began to mount at the highest Australian political and military circles to pull the Australian units out and finally Auchinlek relented, starting Operation Treacle on the 19th of August. This would see the Australian 18th brigade relieved in place by the 1st Independent Carpathian Brigade, a Polish unit under General Kopanski, transported in a series of ferry runs by destroyers and cruisers, and minelayers. The 51st Field Regiment Royal Artillery and 18th Indian Cavalry Brigades also were pulled out.

Poles, and their method of transport
This proved inadequate to ease the political pressures, however. The entire 9th Division had to come out. 24th Australian Brigade left in Operation Supercharge (Not to be confused with Second El Alamein), 19-27 September, being replaced by 16th Infantry Brigade, and 48 Matilda IIs of 4th RTR.
The last lift was Operation Cultivate, 12-25 October. 20th and 24th Australian Brigades went out, with 14th and 23rd Brigades going in, with the 11th Czechoslovak Infantry Battalion tagging along for good measure (The latter got attached to the Poles). On the last night, however, the convoy was spotted and subjected to heavy air attack, sinking the minelayer HMS Latona and damaging others. The resulting chaos ended up meaning that the lift was never completed, and 2/13 Infantry was left behind. Although the rest of 9th Division were probably quite pleased to be out of the siege (the average troop had lost 28lbs in weight), I suspect there was still some envy of 2/13, that they got to see the job done to the end. Whether 2/13 shared that opinion, I’m not so sure. Morshead handed over command of the defense to General Ronal Mackenzie Scobie, and his 70th Division.
Scobie had not only fresh troops, but now the Tobruk Tanks had also been replaced, with 32nd Armored Brigade being able to field about 130 vehicles, over half of which were Matilda IIs. Evidently unaware of this, Rommel had gathered enough forces for another crack at the place, scheduled for about 20th November. He was beaten to the punch, however, by Auchinlek’s Operation Crusader, launched on the 18th November. When distracted by this, Tobruk launched its breakout on the 21st, spearheaded by the tanks. By the end of the day, 32nd Armored was down to 40 vehicles, and cancelled further offensive operations for a couple of days.
At this stage the Kiwis enter the picture. 2nd New Zealand Division, under General Freyburg, was trying to push its way forward, although being held up by the Italians. After a reconsolidation, and with strong tank support from 4th RTR, the New Zealanders tried again, finally ejecting Bologna Division, and in particular the 9th Bersaglieri Regiment. 32nd Armored and its supporting units also made another push, and the two units met at El Duda, on the 230th day of the siege.
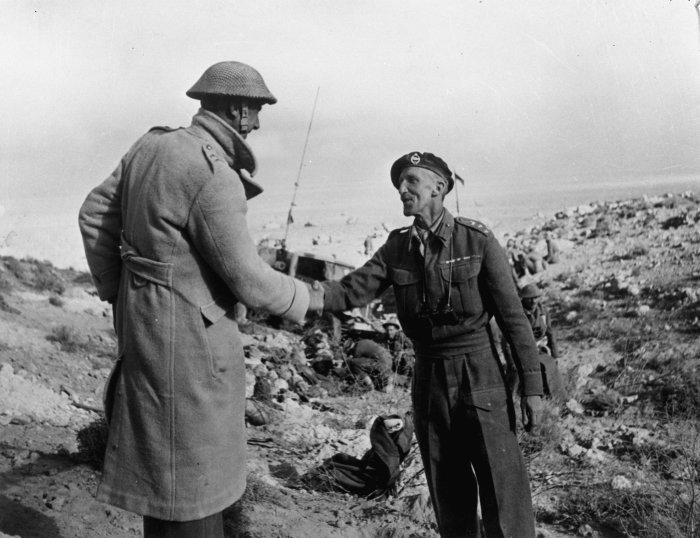
LtCol Sydney Hartnell of New Zealand's 19th Battalion shakes hands with Bigadier Arthur Wilson, 32nd Armored Brigade at El Duda
The link was tenuous, however, and the small corridor broken by the Germans shortly thereafter. It took another attack in the East of Tobruk by The Borders and 7th RTR out of the perimeter on 8th December to make the gap permanent, while the next night the Poles forced a breach in the West.
Thus, after 244 days, was Tobruk relieved. 855 defenders were killed, with 494 missing, another 538 sailors also lost their lives doing the supply runs. Of these, Australian 9th Division lost 744 killed, and 476 missing: There is no doubt as to who took the brunt of the fighting. Holding Tobruk meant that the British forces in Egyot had enough time to regroup, re-arm, and take the fight to the enemy. As a result, there is no wonder that Tobruk earns a memorial on ANZAC Parade.