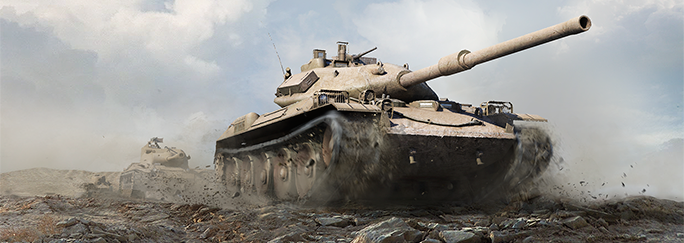
The Game Plan: Team Efficiency’s Guide to the STB-1


Welcome to The Game Plan! If you're looking to strike cold fear into your opponents' hearts upon your approach, the STB-1 is just the tank you've been searching for. With its high DPM and penetration capabilities, you'll have the power to make every moment spent in your vicinity one your enemies quickly come to rue. Here's a quick primer from Team Efficiency's Spawnster on how to play this ferocious Japanese Tier 10 medium to its strengths!
Guide Contents
Overview
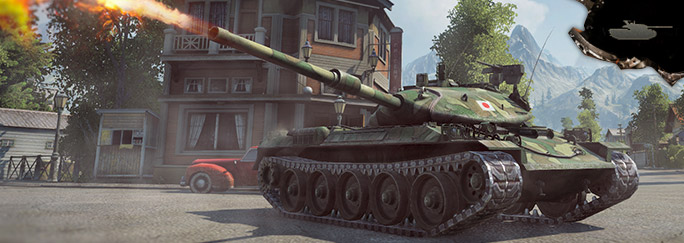
STB-1: The venerable Tier 10 Japanese medium tank. When it was first introduced to World of Tanks, it quickly became synonymous with the word “sexy”. Yes, it is a very good looking tank, with its streamlined hull and curved turret. In this article, we will be looking at what makes the STB-1 a fearsome medium tank.
First, a little history.
In the early 1960s, Mitsubishi started the development of a new tank that complied with government requirements for armament and defense. The first two prototypes of the STB-1 were manufactured in September 1969 for trials. In 1970, the prototypes were shown to journalists, and participated in a military parade.
A fast, semi-accurate medium tank with low but well-sloped armor, very high DPM, and high penetration.
So what makes the STB-1 a must-have Tier 10 medium tank? Read on to find out!
Stats
| Weaponry | Mobility | ||
|---|---|---|---|
| 3,619.11 | DPM | 53 | Top Speed (km/h) |
| 390 | Damage | 20 | Reverse Speed (km/h) |
| 258 | Penetration (mm) | 750 | Power (hp) |
| 6.47 | Reload Time (sec) | 20.03 | Power/Weight (hp/t) |
| 9.28 | Rate of Fire (rnds/min) | 52 | Tank Traverse (°/sec) |
| 2.07 | Aim Time (sec) | Terrain Resistance | |
| 0.32 | Dispersion (m) | 0.90 | ... hard |
| 0.16 | ... moving | 0.99 | ... medium |
| 0.16 | ... tank traverse | 1.98 | ... soft |
| 0.14 | ... turret traverse | ... | |
| 3 | ... after firing | 13 | Gun Elevation (°) |
| 2 | ... damaged | 10 | Gun Depression (°) |
| ... | 35 | Gun Traverse (°/sec) | |
| 150 | Damage vs. Modules | 180 / 180 | Gun Traverse Range (°) |
| 105 | Caliber (mm) | 46.77 | Turret Traverse (°/sec) |
| 1,478 | Shell Velocity (m/sec) | ... | |
| 720 | Max Range (m) | 40,000 | Load Capacity (kg) |
| 50 | Ammo Capacity | 37,450 | Total Weight (kg) |
| 1,200 | Shell Cost (Credits) | 45,000 | Brake Force |
| Others | |||
| 110 / 35 / 25 | Hull Armour (f/s/r mm) | ||
| 132 / 132 / 37 | Turret Armour (f/s/r mm) | ||
| 20 | Track Armour (mm) | ||
| ... | |||
| 1,950 | Health | 479.99 | View Range (m) |
| 360 | Engine Health | 798.21 | Radio Range (m) |
| 180 | ... regen health | 12 | Fire Chance (%) |
| 250 | Track Health | 6,100,000 | Tank Cost (Credits) |
| 190 | ... regen health | ... | |
| 260 | Ammo Rack Health | 6.84 / 5.13 / 1.45 | Camo (%) |
| 180 | ... regen health | 10 / 11 | Battle Tier |
If there’s one thing that defines the STB-1, it’s damage per minute. With a fully trained crew, and with the right equipment and consumables, it's able to dish out a frightening 3619 damage per minute, the highest among all the tanks in the game. Able to reload every 6.32 seconds (with 100% crew, BIA, Rammer, Vents and Onigiri), and with an alpha damage of 390, it is a force to be reckoned with on the battlefield. Using this to your advantage will set you in good stead, especially against heavy tanks with long reload times such as the E-100, as you'll be able to pump 2 or even 3 shells out before they can even get 1 on you.
However, with this amazing rate of fire comes the STB-1's biggest weakness – aim time. At 2.3 seconds, it may seem quite comparable to that of other medium tanks. But in terms of the gun's soft stats, it has the worst dispersion of its turret and hull traverse at 0.16. Comparing this to an Obj. 140 or M48 Patton, which have 0.06 and 0.08 dispersion respectively, clearly the STB-1 suffers considerably from this weakness.
This literally translates to a much longer wait for the bloom of the reticle to shrink, making snap shots unreliable at a distance. It is still good at sniping at long range, though you must be fully aimed-in to hit accurately. Closing the distance of engagement negates this problem somewhat.
However, the STB-1's awesome depression of -10 degrees still makes it a joy to play on ridges. Which brings us to the next point.
Armour Profile
 |
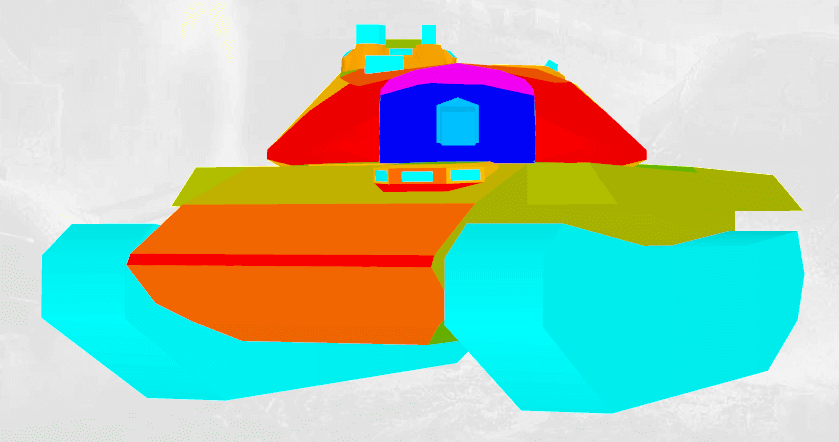 |
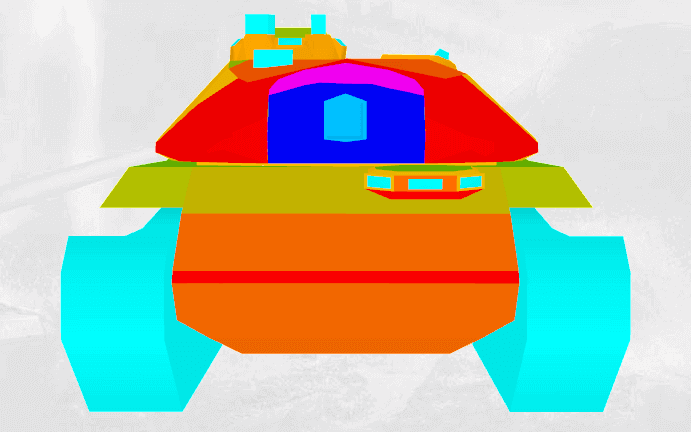
For a medium tank, the hull armour is average at 110mm in the front, 35mm at the side, and 25mm at the rear. Angling your hull may induce a lucky bounce because it is sloped at 56 degrees. But bouncing is generally not reliable here; with only 35mm of side armour, neither is side-scraping.
However, the turret is a different story altogether. Thanks to its extreme slope and curved shape, you can reliably bounce shots, especially if your tank is hull-down behind a ridge, and make full use of the -10 degrees of depression at the same time. While the bottom portion of the turret beside the mantlet is still soft at around 172mm, the other part of the turret has around 300-600mm of effective armour. Just make sure that your cupola is not overly exposed, or it’s liable to get penetrated with its measly armor of only 38mm - 120mm. Playing the ridgeline will make the cupola a smaller target.
Tank Setup
Ammo
HEAT |
I normally run 30 APCR/15 HEAT/5 HE. The APCR penetration at 258mm is sufficient for most tanks that you will encounter. I usually only use the 330mm HEAT shells for the most heavily-armoured tanks in the game when their weak spots are hidden – for instance, when I need to aim for the cupola of a hull-down T110E5.
Equipment & Consumables
Rammer |
 Vertical Stabiliver |
  Coated Optics/Vents |
Rammer, Vertical Stabilizer, Coated Optics/Vents. This is a no-brainer. Using Coated Optics enhances the STB-1's standard view range of 410m by another 10%, so you will be able to spot targets for yourself more easily, instead of having to rely on others. On the other hand, though Vents will give you a slight boost to your reload and the general performance of the tank, its bonus does not outweigh the benefits of Coated Optics.
 Repair Kit |
 First Aid Kit |
  Fire Extinguisher/Onigiri |
Repair Kit, First Aid Kit, Fire Extinguisher/Onigiri. Totally up to you how you want to run this. Pretty much standard here.
Crew Skills
| Commander | Sixth Sense | Camouflage | Brothers in Arms | Repairs |
|---|---|---|---|---|
| Gunner | Snap Shot | Camouflage | Brothers in Arms | Repairs |
| Driver | Smooth Ride | Camouflage | Brothers in Arms | Repairs |
| Loader | Camouflage | Repairs | Brothers in Arms | Safe Stowage |
Gameplay
Before the start of any game, anaylze the tank composition of the enemy team. Choose the best location on the map, where you can use its top speed of 53km/h to get into the best position to spot the enemy, and/or to deliver the first shot to enemy targets still moving to their position. Be aware of proper hull-down positions on the map, and use your tank's -10 degrees of depression to your advantage.
If your team consists of more medium tanks, then it's better to wolf pack together to win a side. Remember, try your best to not expose your hull. Due to your gun's mediocre soft stats, it's always better to shoot at a distracted enemy, as you will need time to aim. The STB-1 also doesn't really have the best camouflage rating among the Tier 10 tanks, so work the bushes. As the game progresses, try to look for opportunities to flank the enemy.