Commanders,
Finally, here we are at the top of the new Italian tank destroyer line. Let's see what the
 X
X
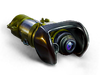
![]() Controcarro 3 Minotauro
has to offer as the crown jewel!
Controcarro 3 Minotauro
has to offer as the crown jewel!
Gameplay

As the crown jewel of the new line, the
X
![]() Controcarro 3 Minotauro
has key battle parameters similar to those of other high-tier TDs, but this is where they reach their peak performance.
Controcarro 3 Minotauro
has key battle parameters similar to those of other high-tier TDs, but this is where they reach their peak performance.
Like its brothers-in-arms, this vehicle has excellent frontal hull armor and few weak spots, meaning that it can easily repel enemy shells and save your precious HP in a one-on-one duel.
The rotating turret tops out at 90 degrees of total turret traverse angles, with 45 degrees to either side! The gun depression angles of –10 degrees are also good. The accuracy of the 130 mm gun is not too impressive, but its aiming time is very decent for this caliber, especially compared to other heavy tanks and tank destroyers with comparable guns. The penetration values are also more similar to those of heavy tanks rather than tank destroyers. This does not make firing from a long distance very comfortable, so the Minotauro will feel right at home on the front line as a powerful breakthrough vehicle. It will perform brilliantly in both frontal assaults and positional hull-down duels, assisting heavies and putting pressure on the enemy in close combat.
The vehicle’s top speed of 30 km/h and its acceleration remain competitive compared to heavy tanks. It can confidently follow other allies to support them on the flanks.
Not Your Classic Autoloader: How It Works
Unlike high-tier medium and heavy Italian tanks, Tier VII–X tank destroyers are equipped with a drum-type autoloader. However, this is not the classic autoloader that you might play on some popular French vehicles.
The autoloader has five shells with 530 HP of alpha damage. The full reload time is 24 seconds, and between shots—surprise! — a whopping 8 seconds! This may seem strange on paper, but in practice, an autoloader with these unique parameters is perfect for trying out new tactics and keeping your opponents on their toes.
Always remember that you should treat this vehicle like a standard tank with a normal cyclic gun. Its alpha damage is equal to that of alpha heavies, but with a reload time of eight seconds, it’s faster than many brawlers, such as the IS-7 or the 60TP Lewandowskiego. This means that you can jump into a 1v1 duel and come out victorious, thanks to your huge in-clip DPM—up to 2650 HP!—and excellent frontal armor. One drum is enough to outshoot most of your opponents, even those with large HP pools.
Recommended Setup
| Equipment | ||
|---|---|---|
 |
 |
 |
This vehicle works best in close-range. To make the most of it in battle, prepare your vehicle with Improved Aiming to hasten your shot preparations. Since the Controcarro 3 Minotauro will often be in the face of danger, improve its survivability with Improved Hardening.
Use hull down tactics whenever possible. Its turret has 300 mm of armor that can withstand damage from the same tier guns.
Crew Perks and Skills
| Crew | 1st | 2nd | 3rd |
|---|---|---|---|
| Commander |  |
 |
 |
| Gunner |  |
|
 |
| Driver |  |
|
 |
| Loader |  |
|
 |
Prioritize learning skills in the following order:
- Commander: "Sixth Sense" Perk
- Gunner: "Snap Shot" Skill
- Driver: "Smooth Ride" Skill
- Loader: "Safe Stowage" Skill
It is essential for the Commander to acquire the "Sixth Sense" perk. This should be your top priority. The next skill/perk is the "Repair" skill for every member of your crew.
Having "Snap Shot" improves accuracy during turret rotation which will come in handy when it's crunch time on the frontlines.
The "Smooth Ride" skill helps reduce dispersion while shooting on the move. It also reduces the aim time needed when the vehicle is stationary.
Learning the "Safe Stowage" skill increases the durability of your ammo rack to reduce the chances of undesirable explosions.